We're sorry. The shop is temporarily closed. All orders will be sent after 15th of January.
Set up guide for Openpilot kit in Toyota:
Step 1:
Check if your car is supported here: https://github.com/commaai/openpilot/blob/master/docs/CARS.md
Step 2:
Choose Springer hardware kit that fits your particular car (note, Springer C3X should be available by the end of February 2024):
Step 3:
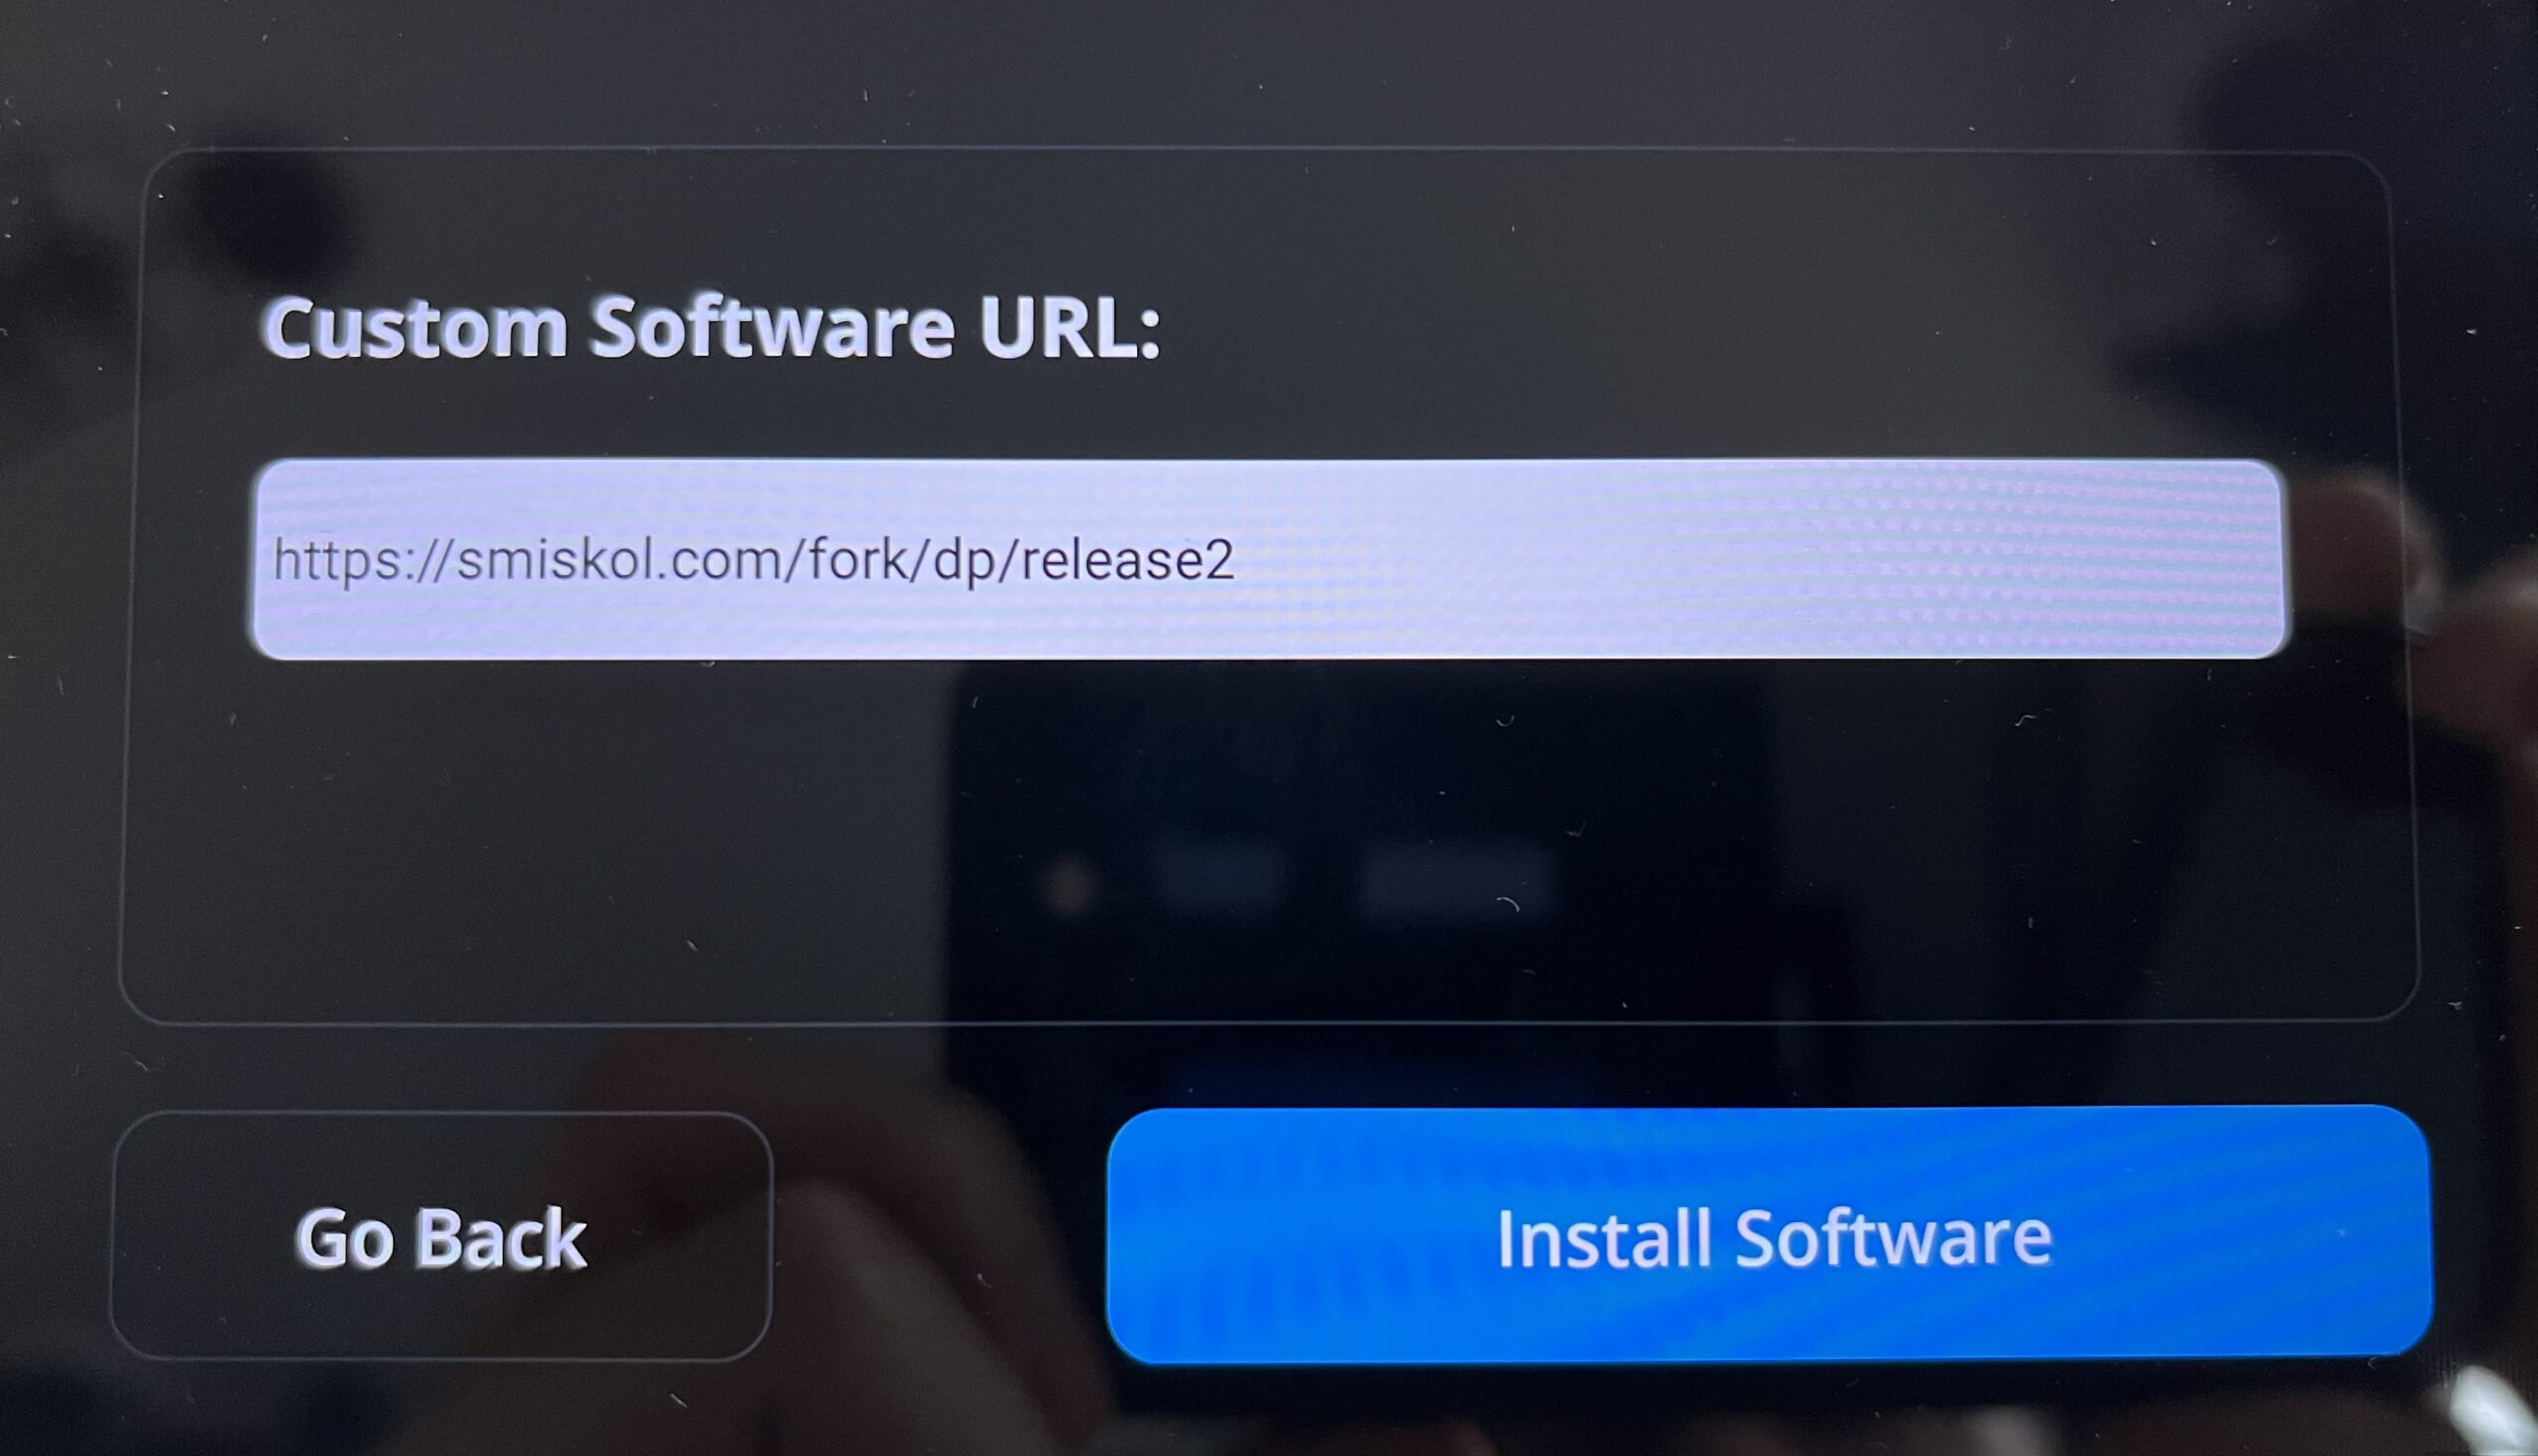
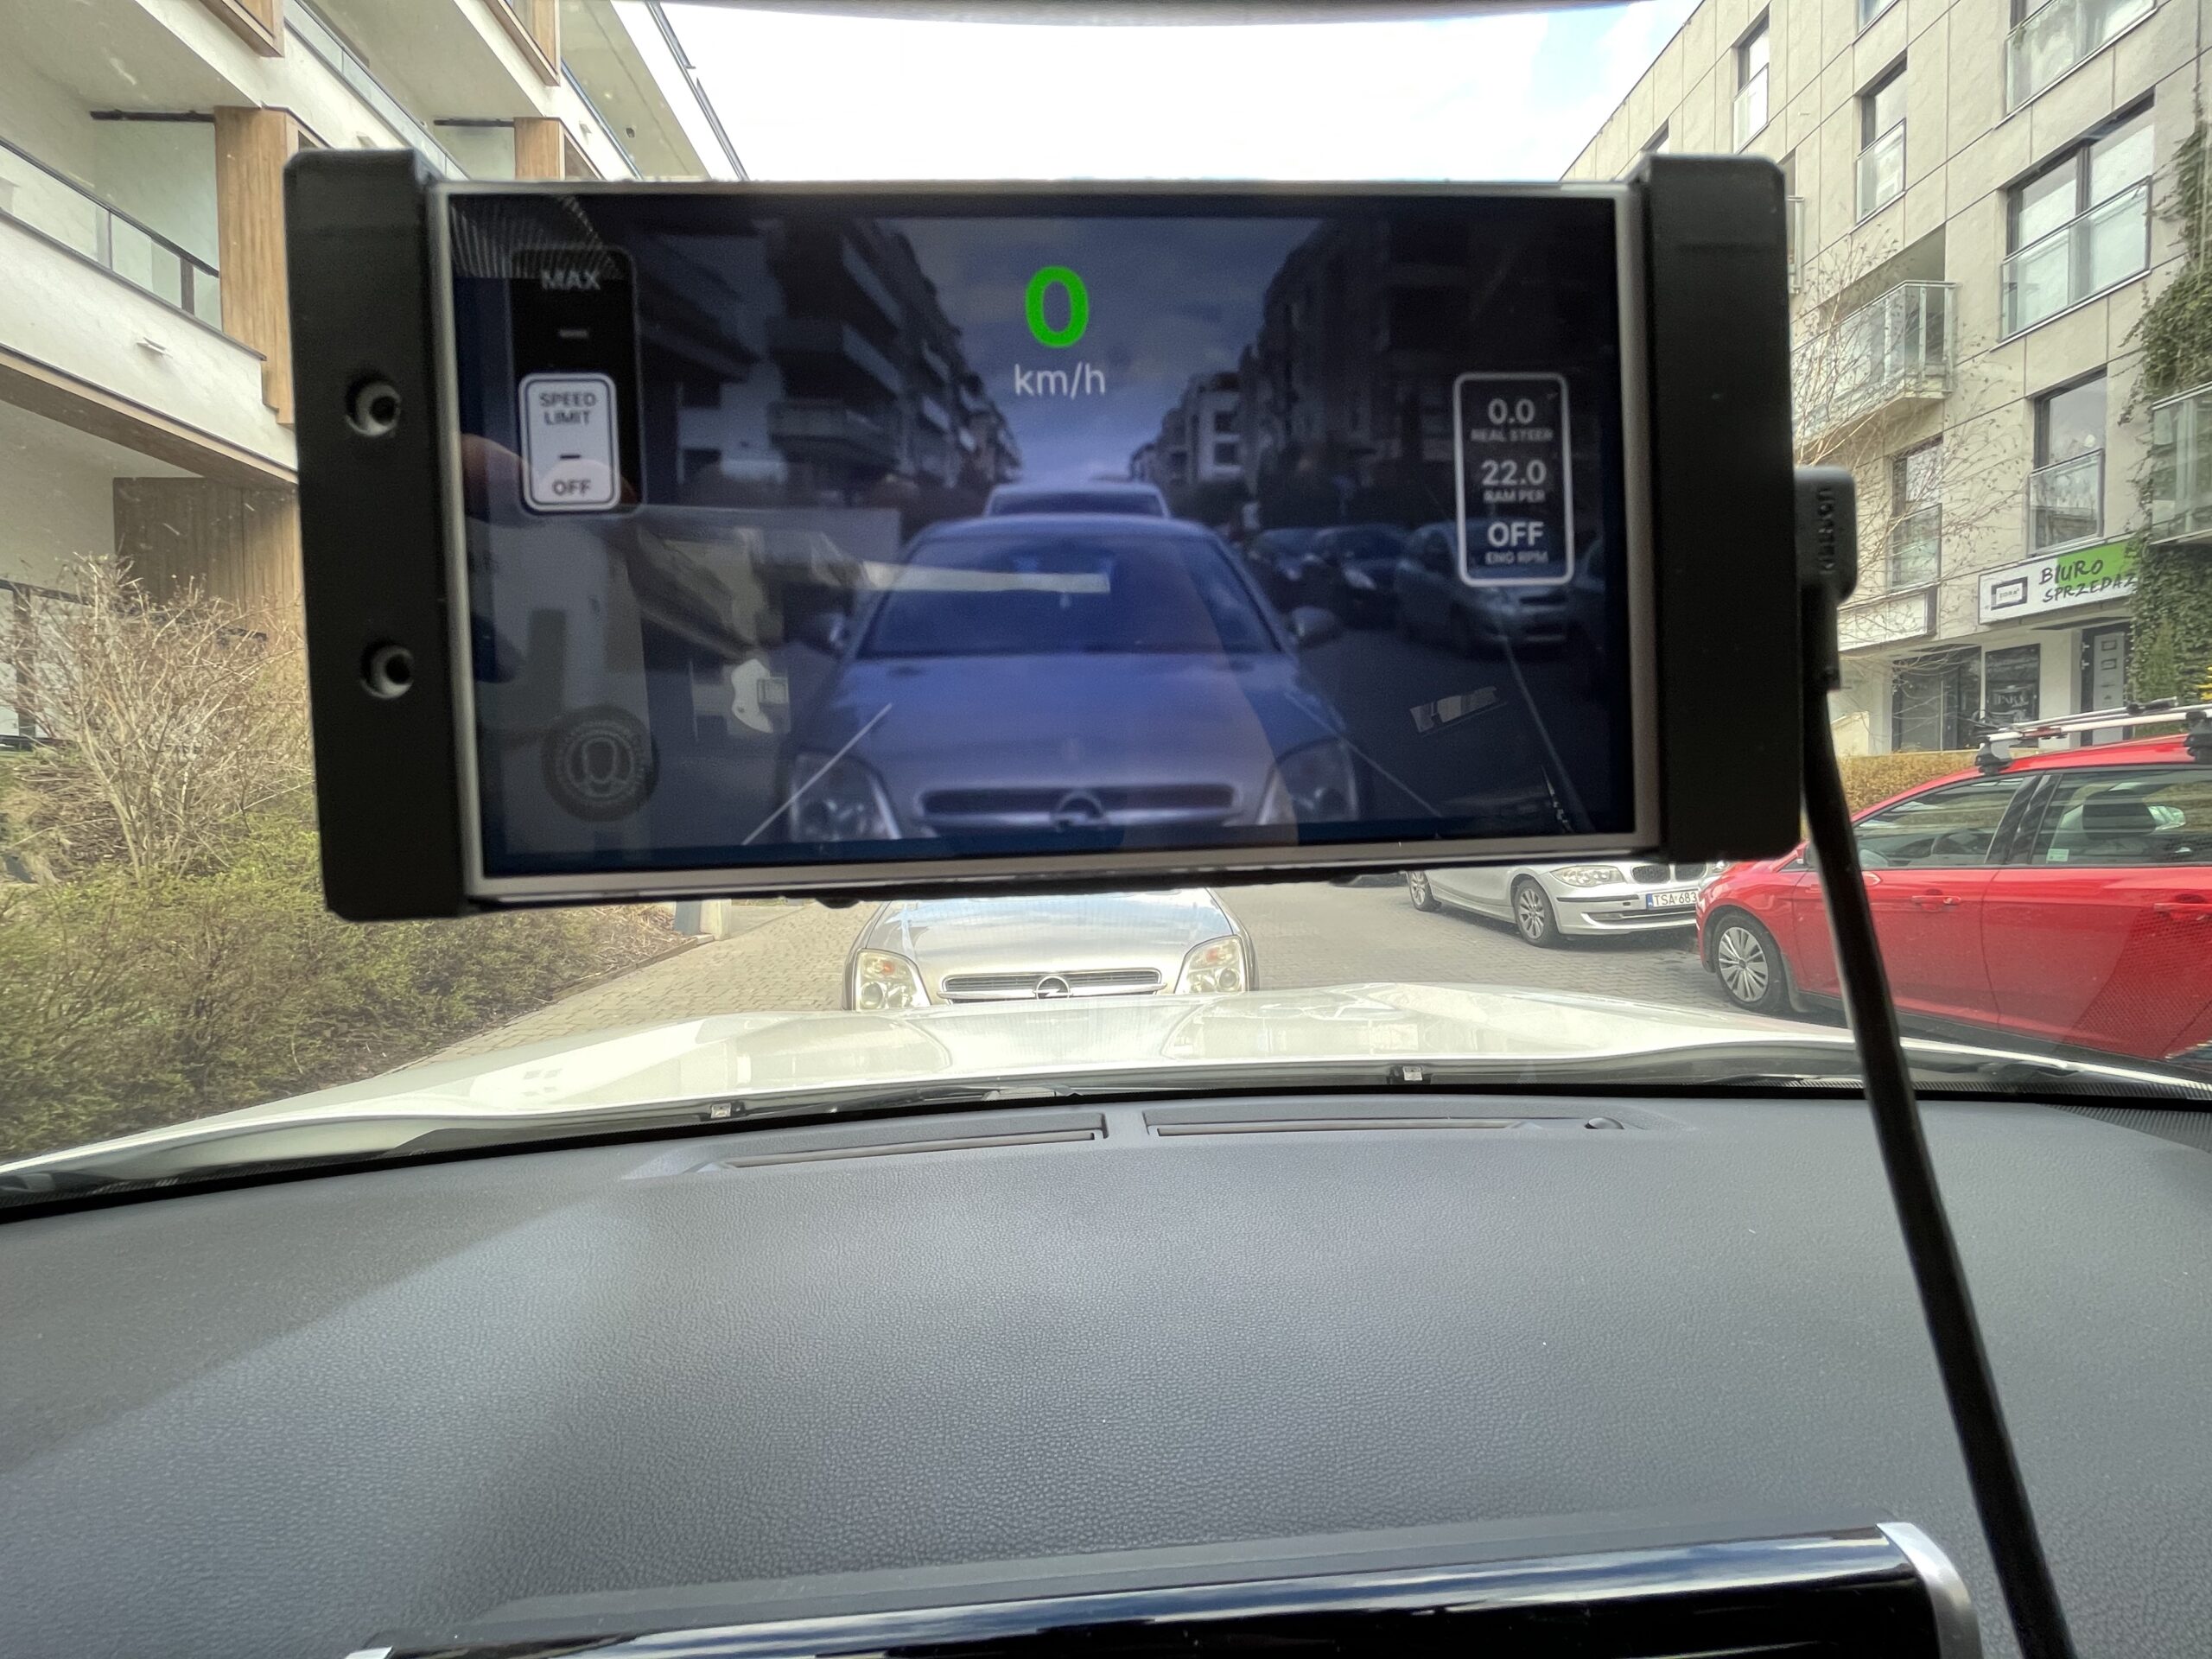
After connecting device to a power supply and your local network, select a “Custom Software(advanced)” in order to install your designed software.
Next, put the link of your choice in the device:
Step 4:
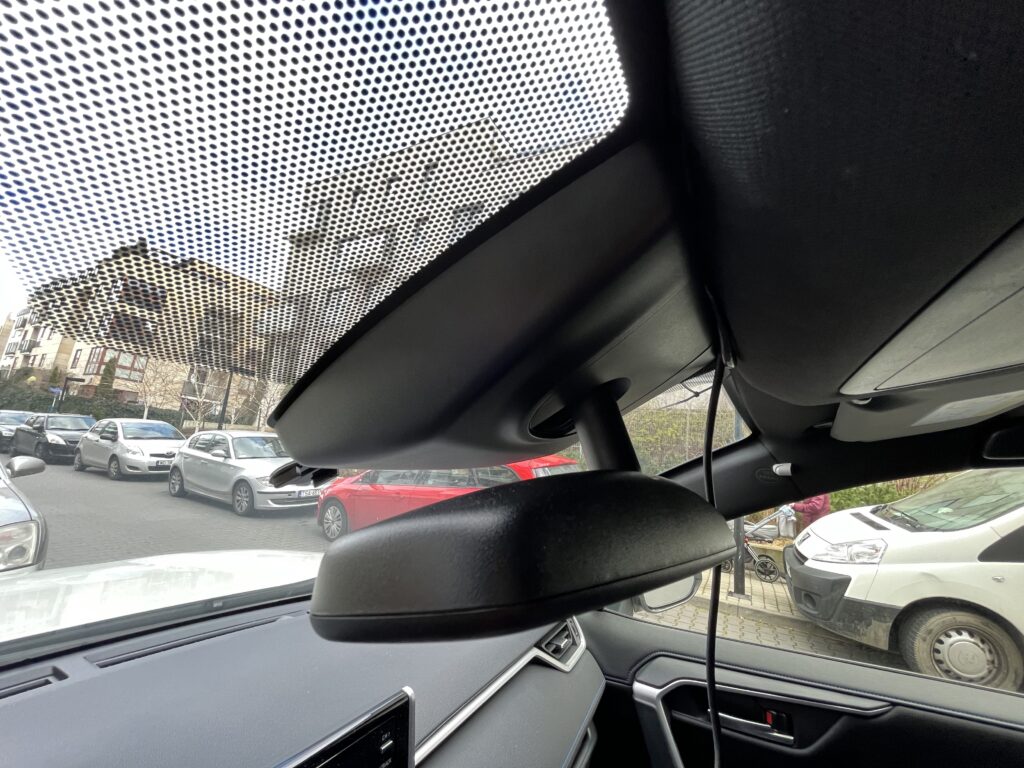
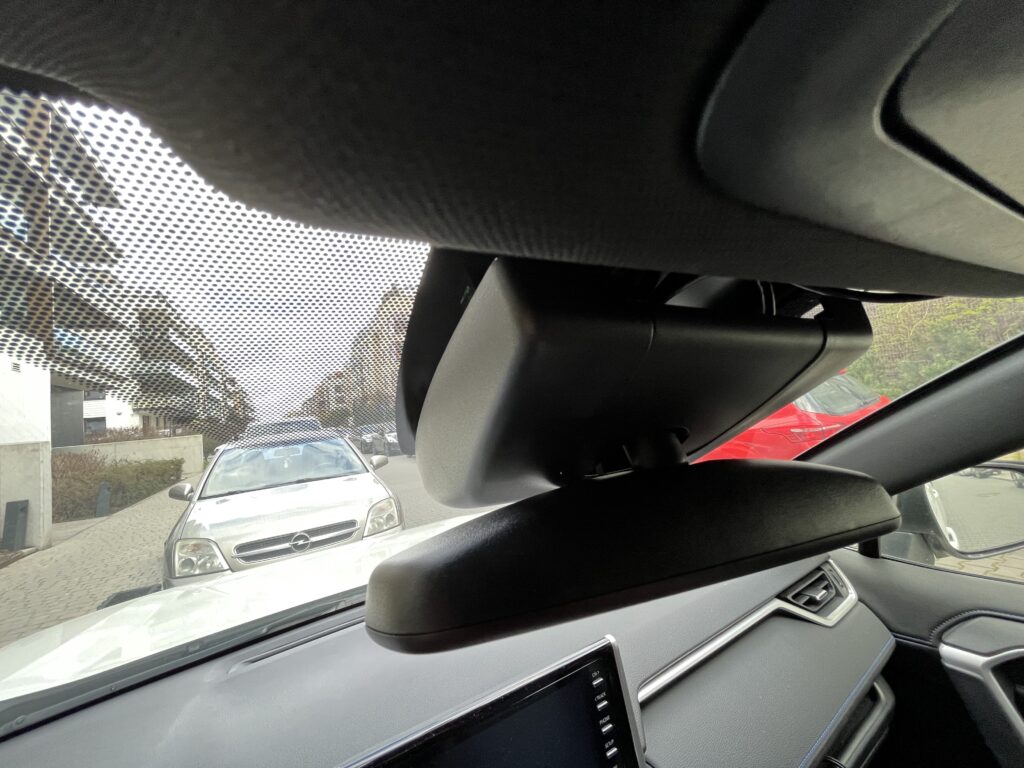
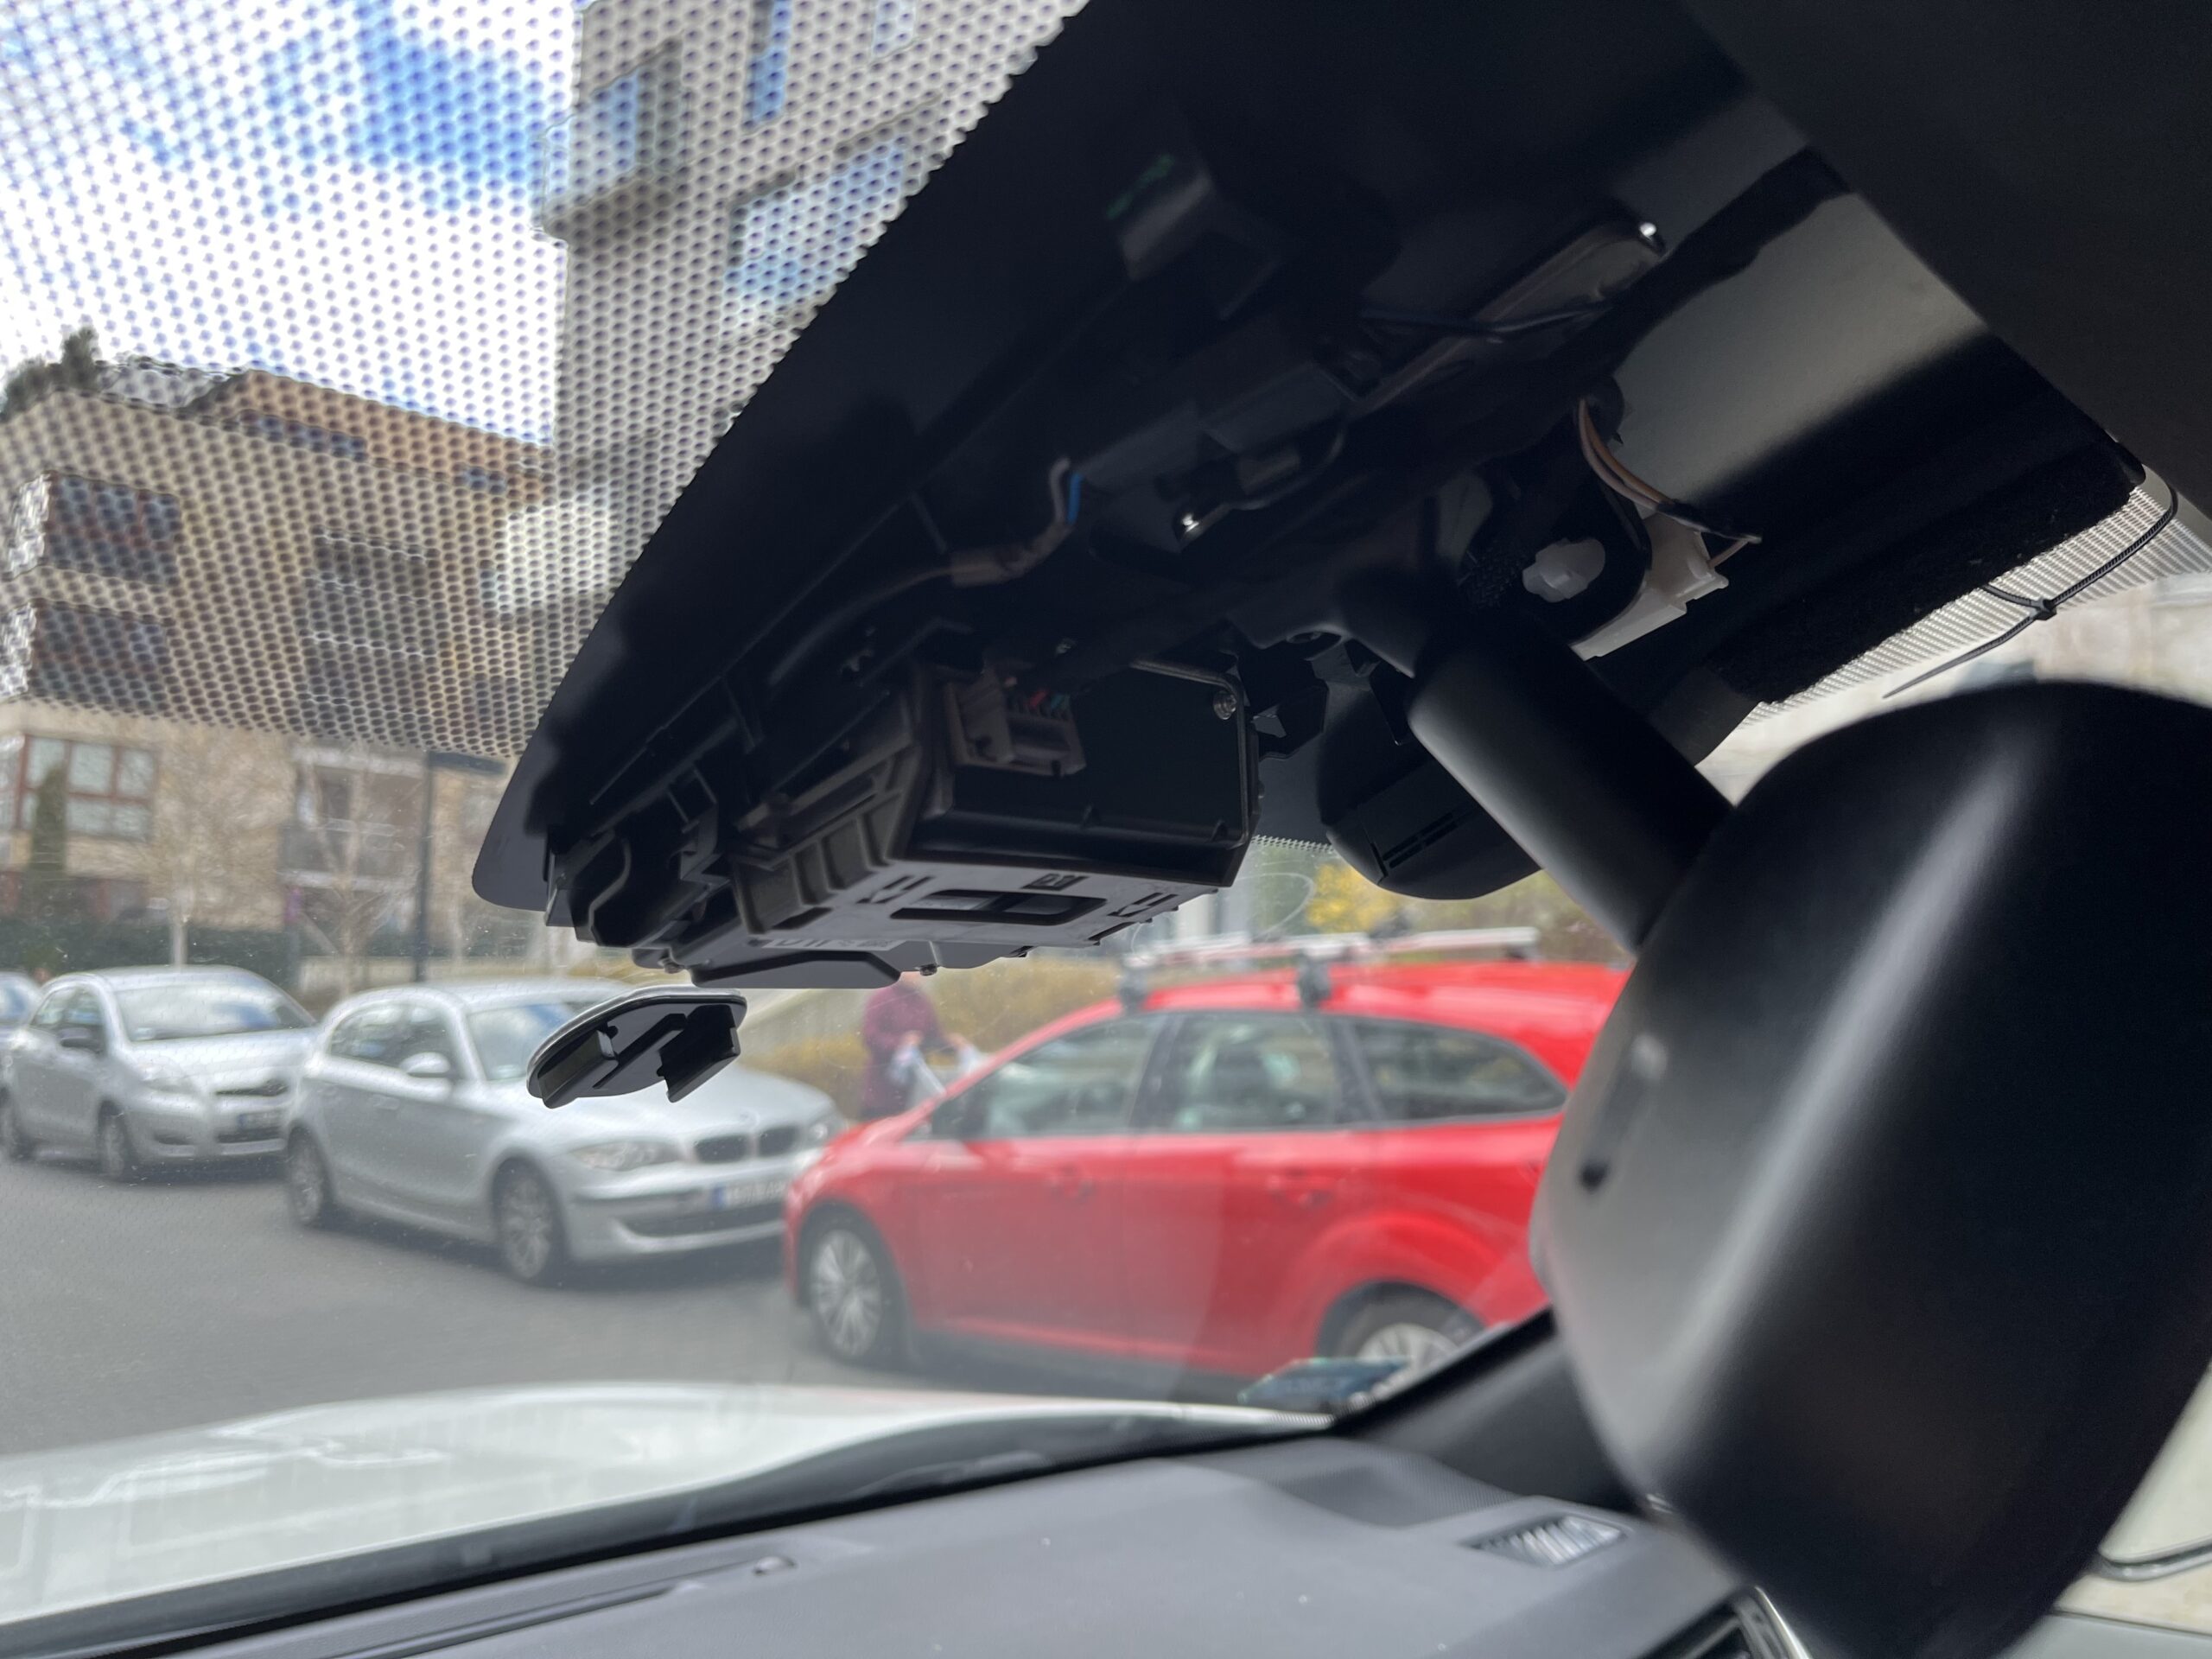
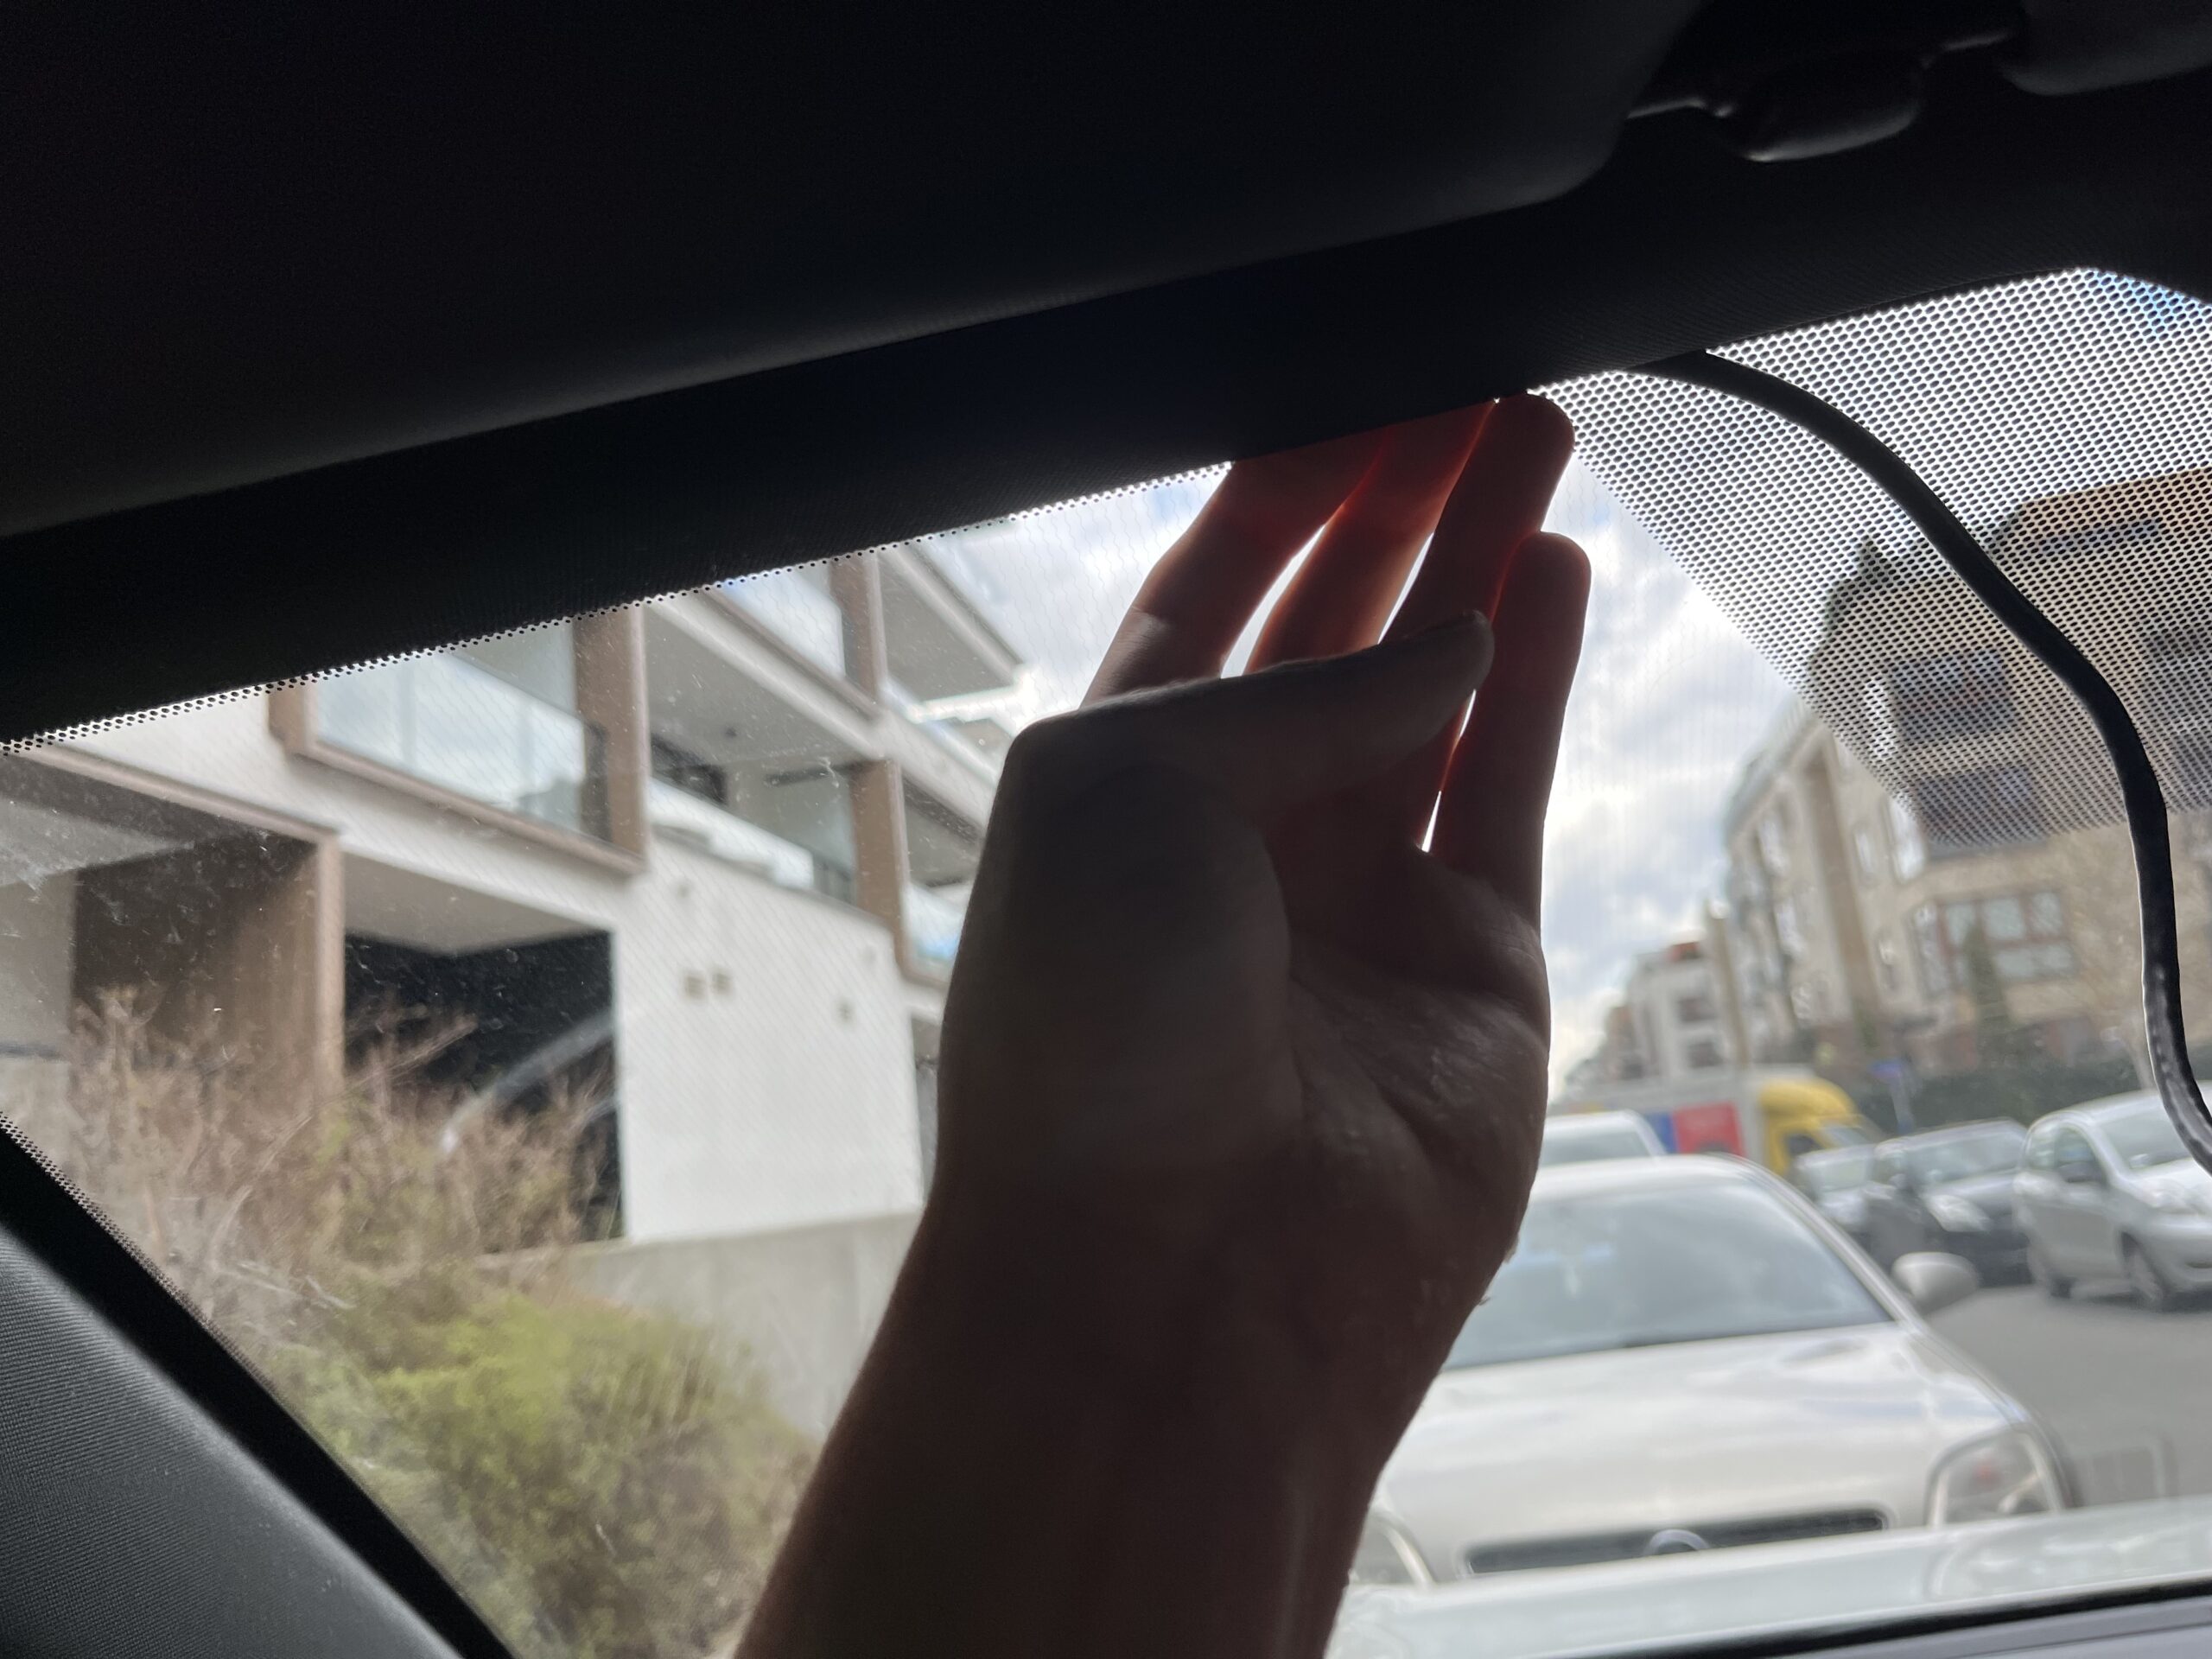
Take off the windshield camera plastic cover by pushing it to the front. Then give it a soft shake to detach it from the clips that are inside.
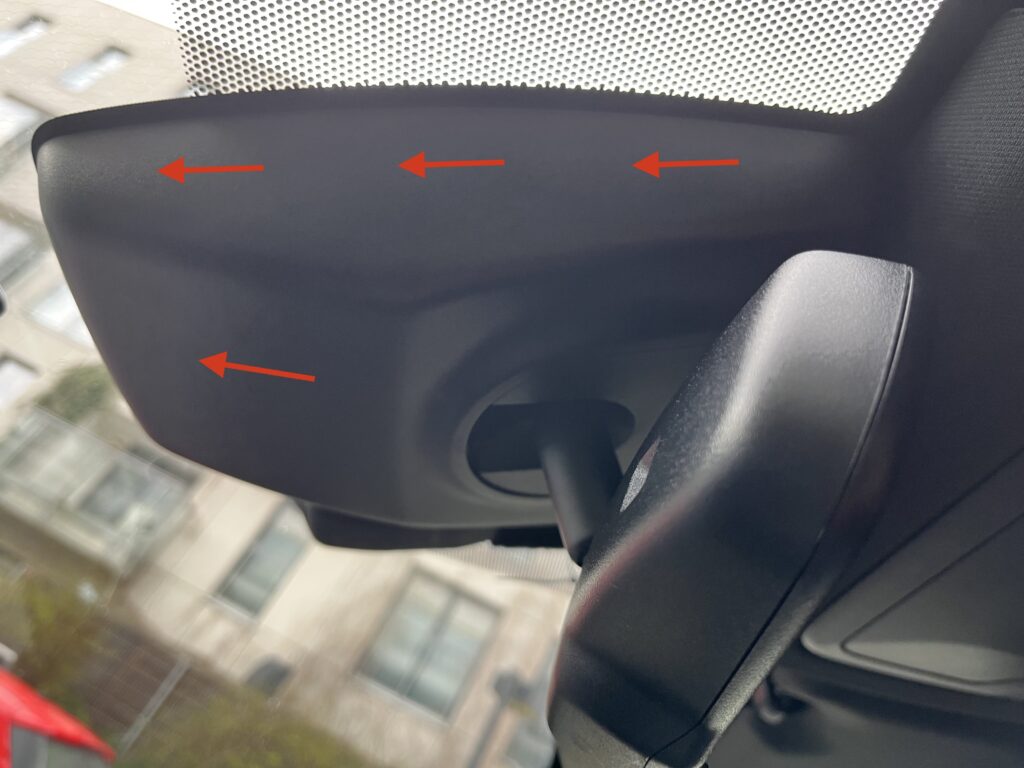
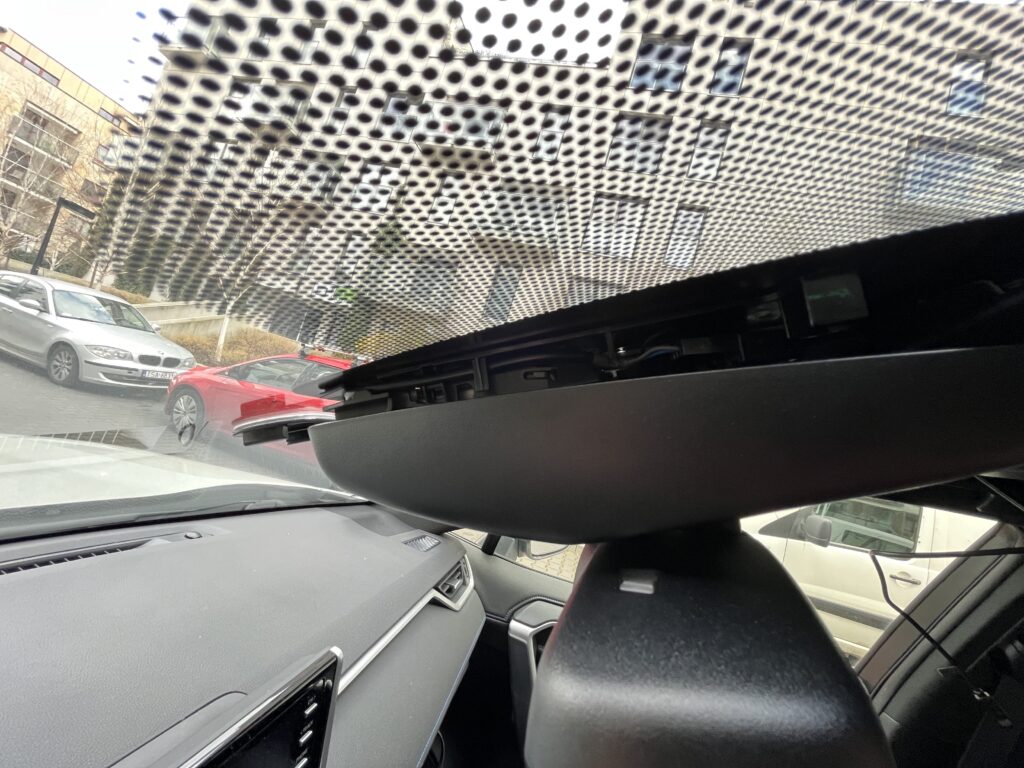

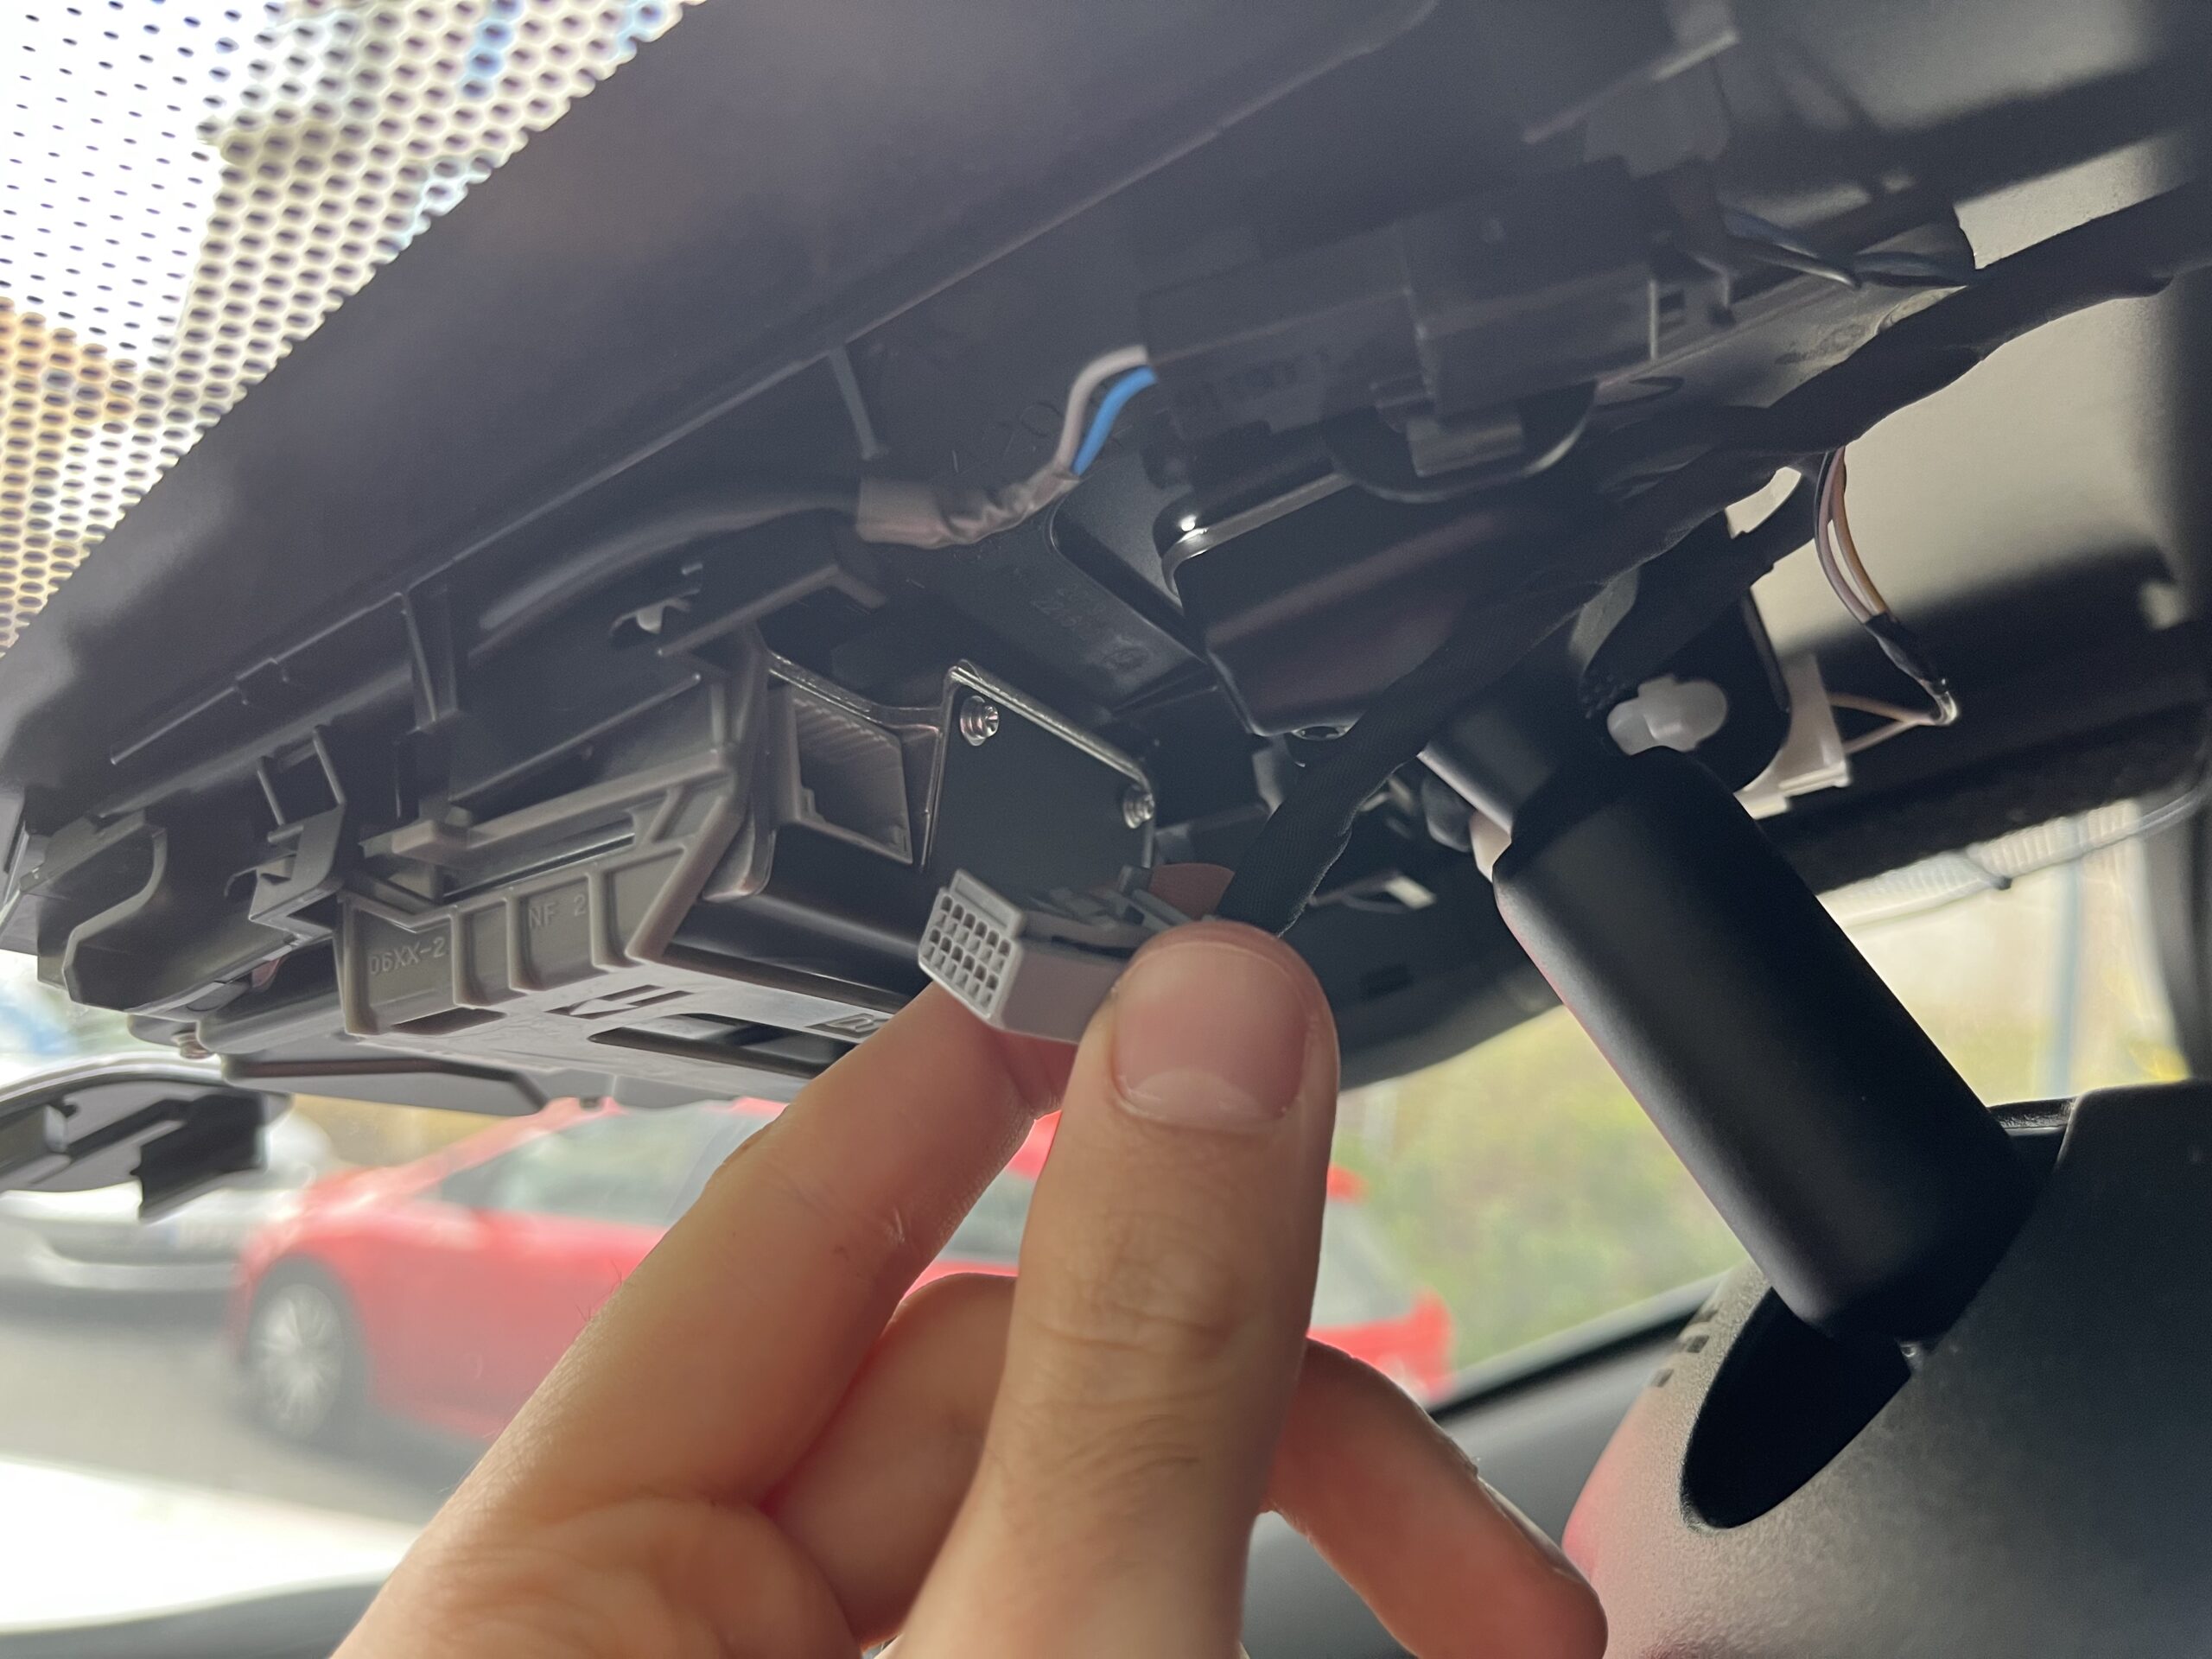
After that, reach with your fingers underneath the plastic cover, there should be two clips that open in the following way:
Step 5:
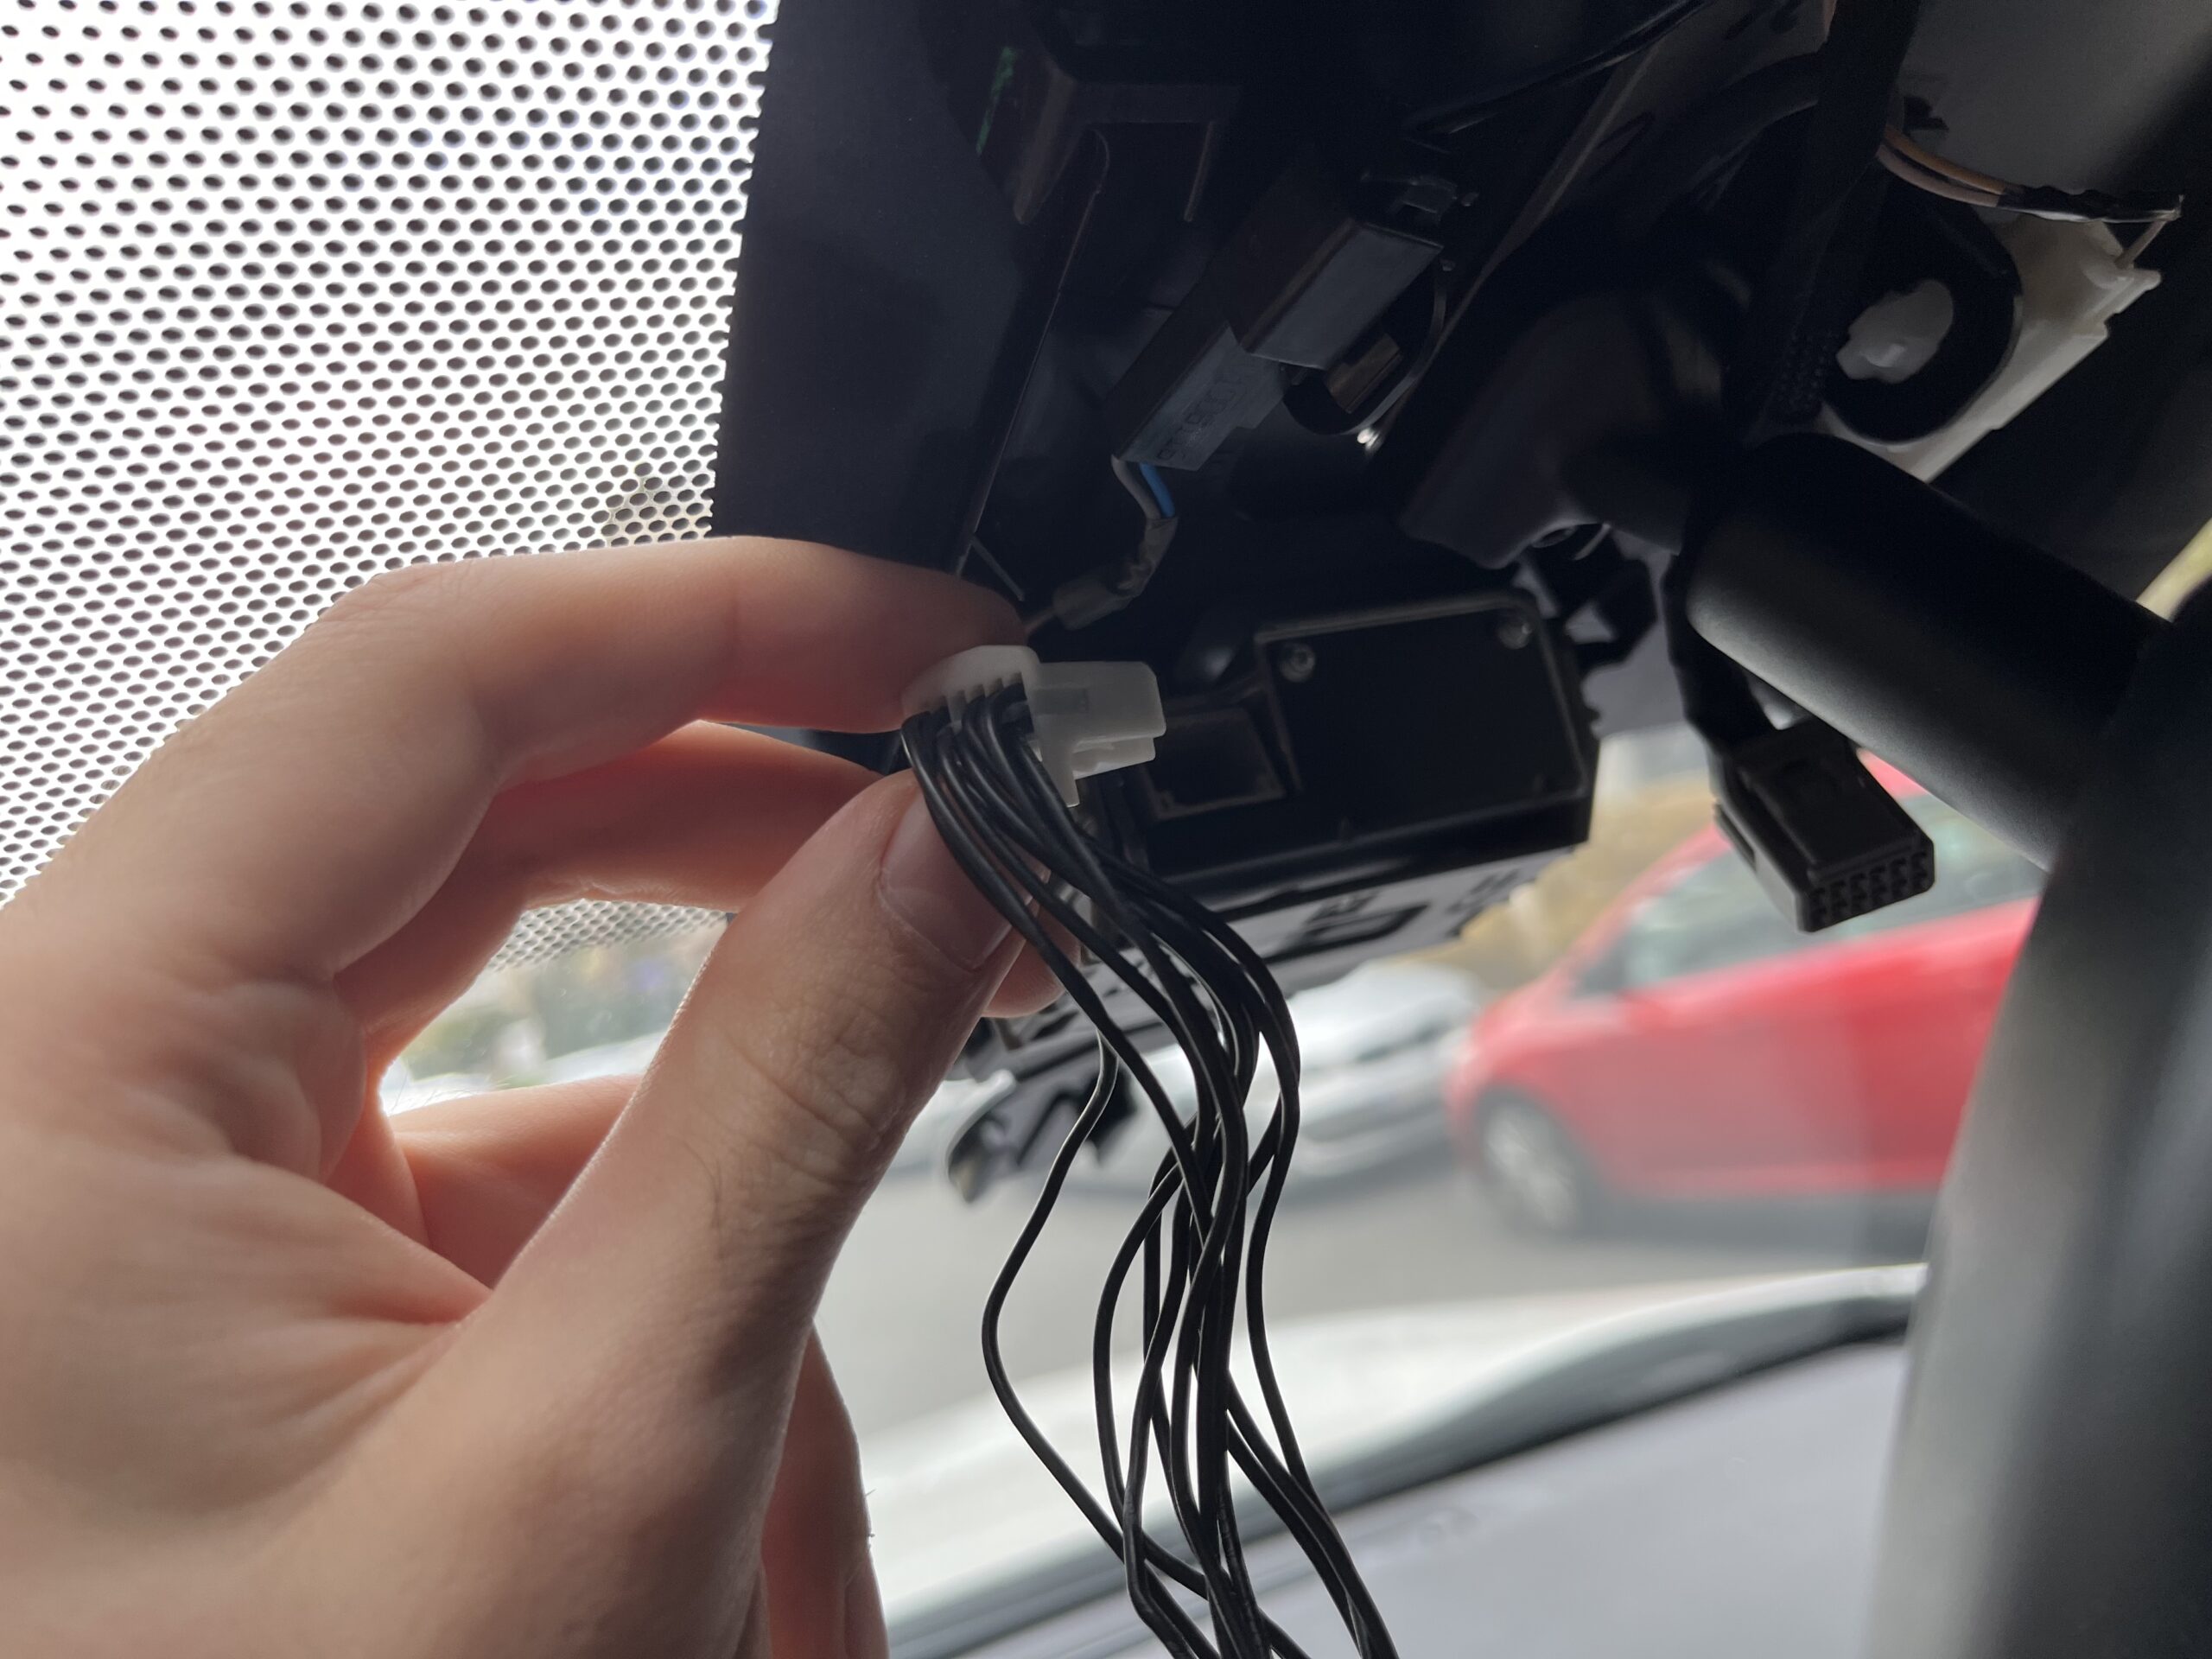
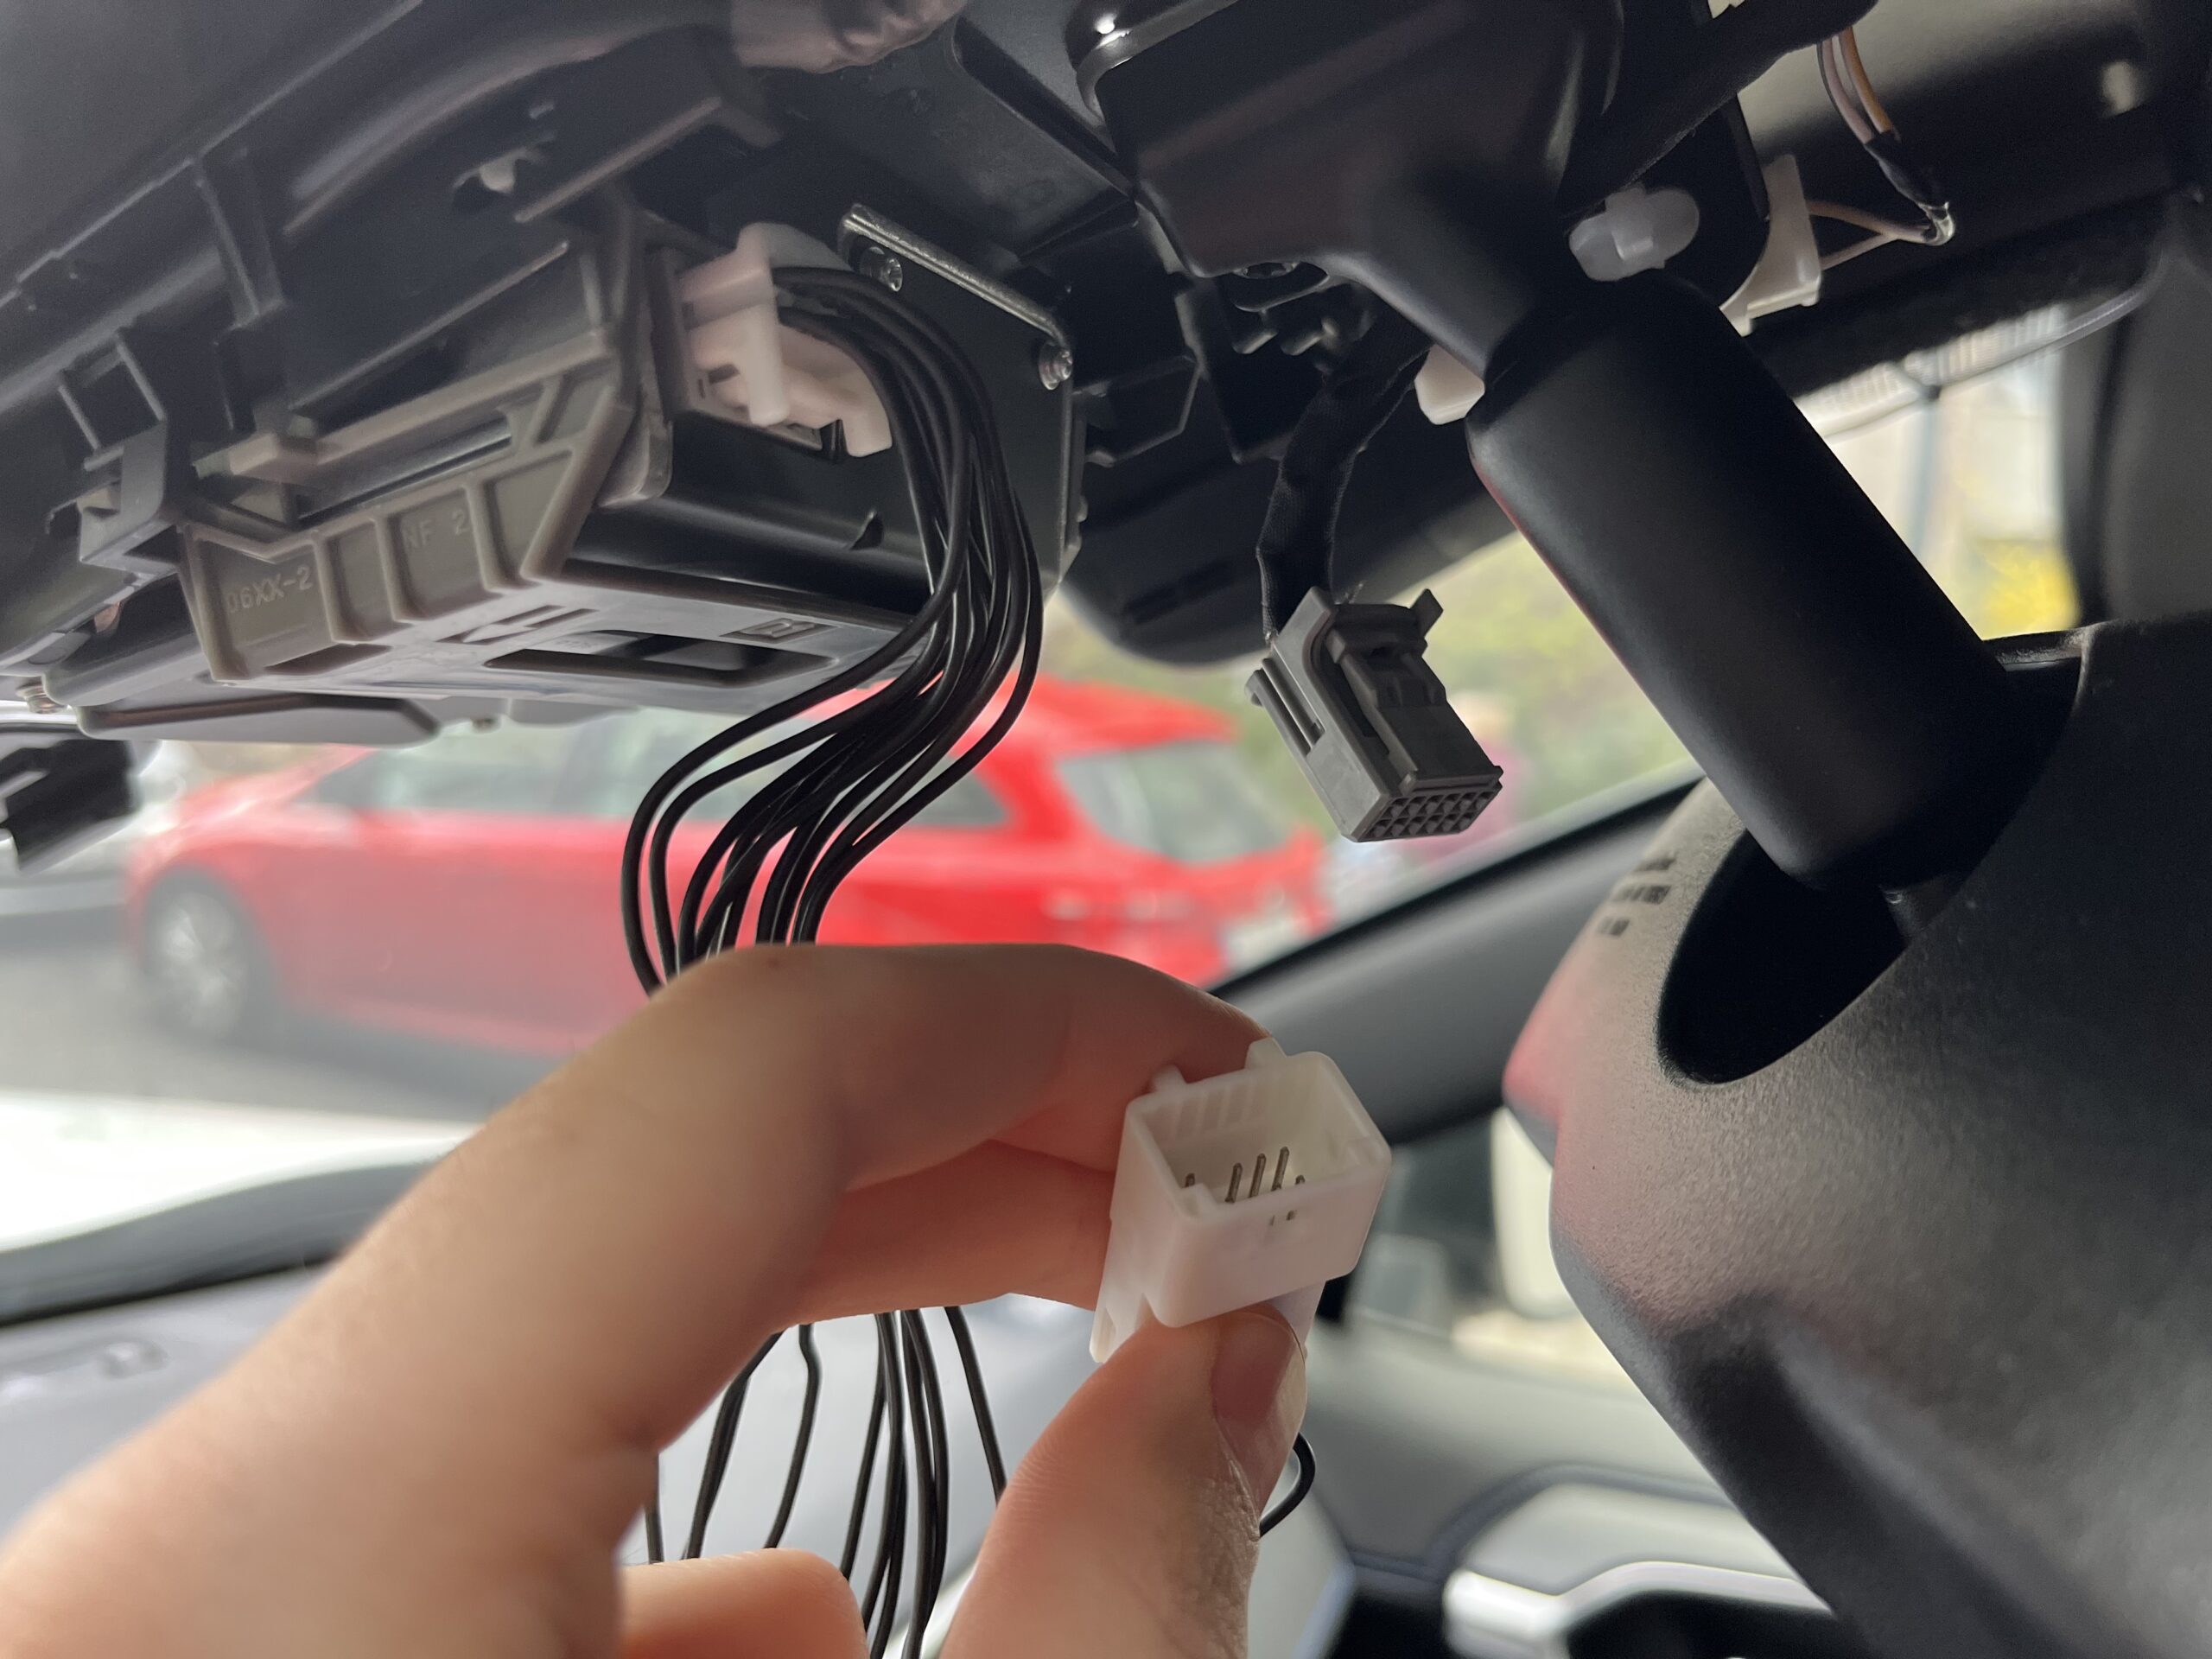
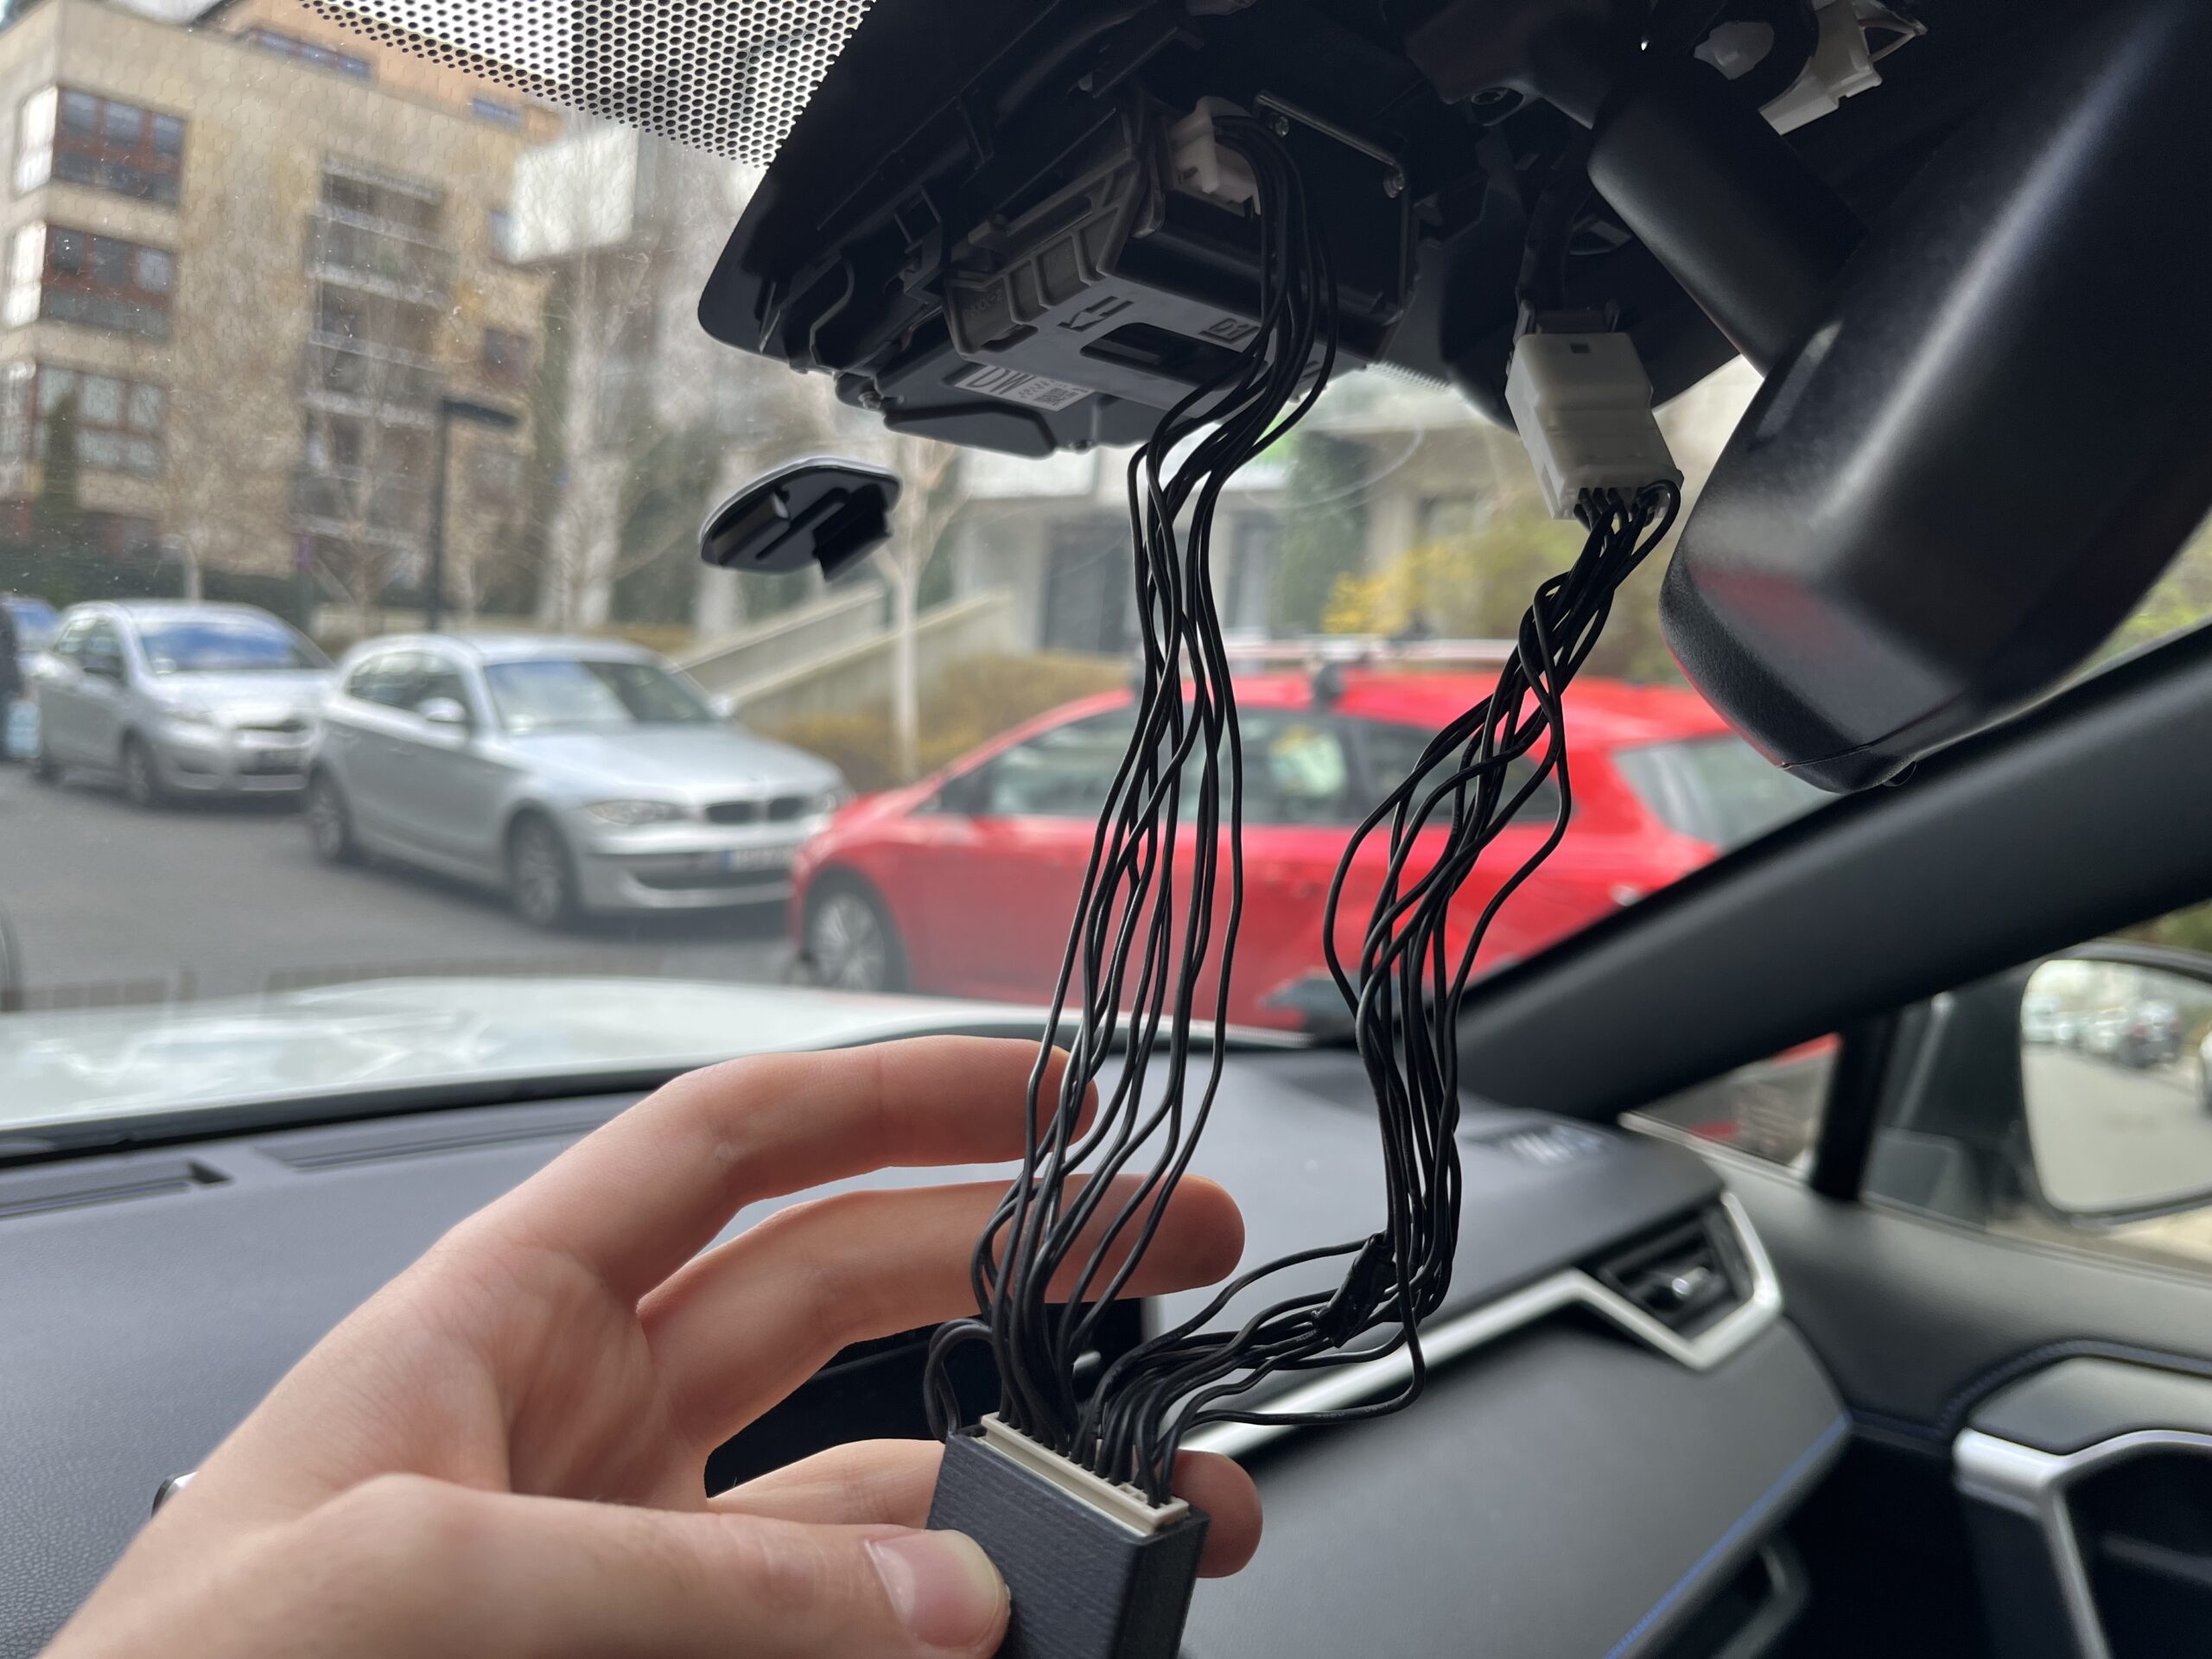
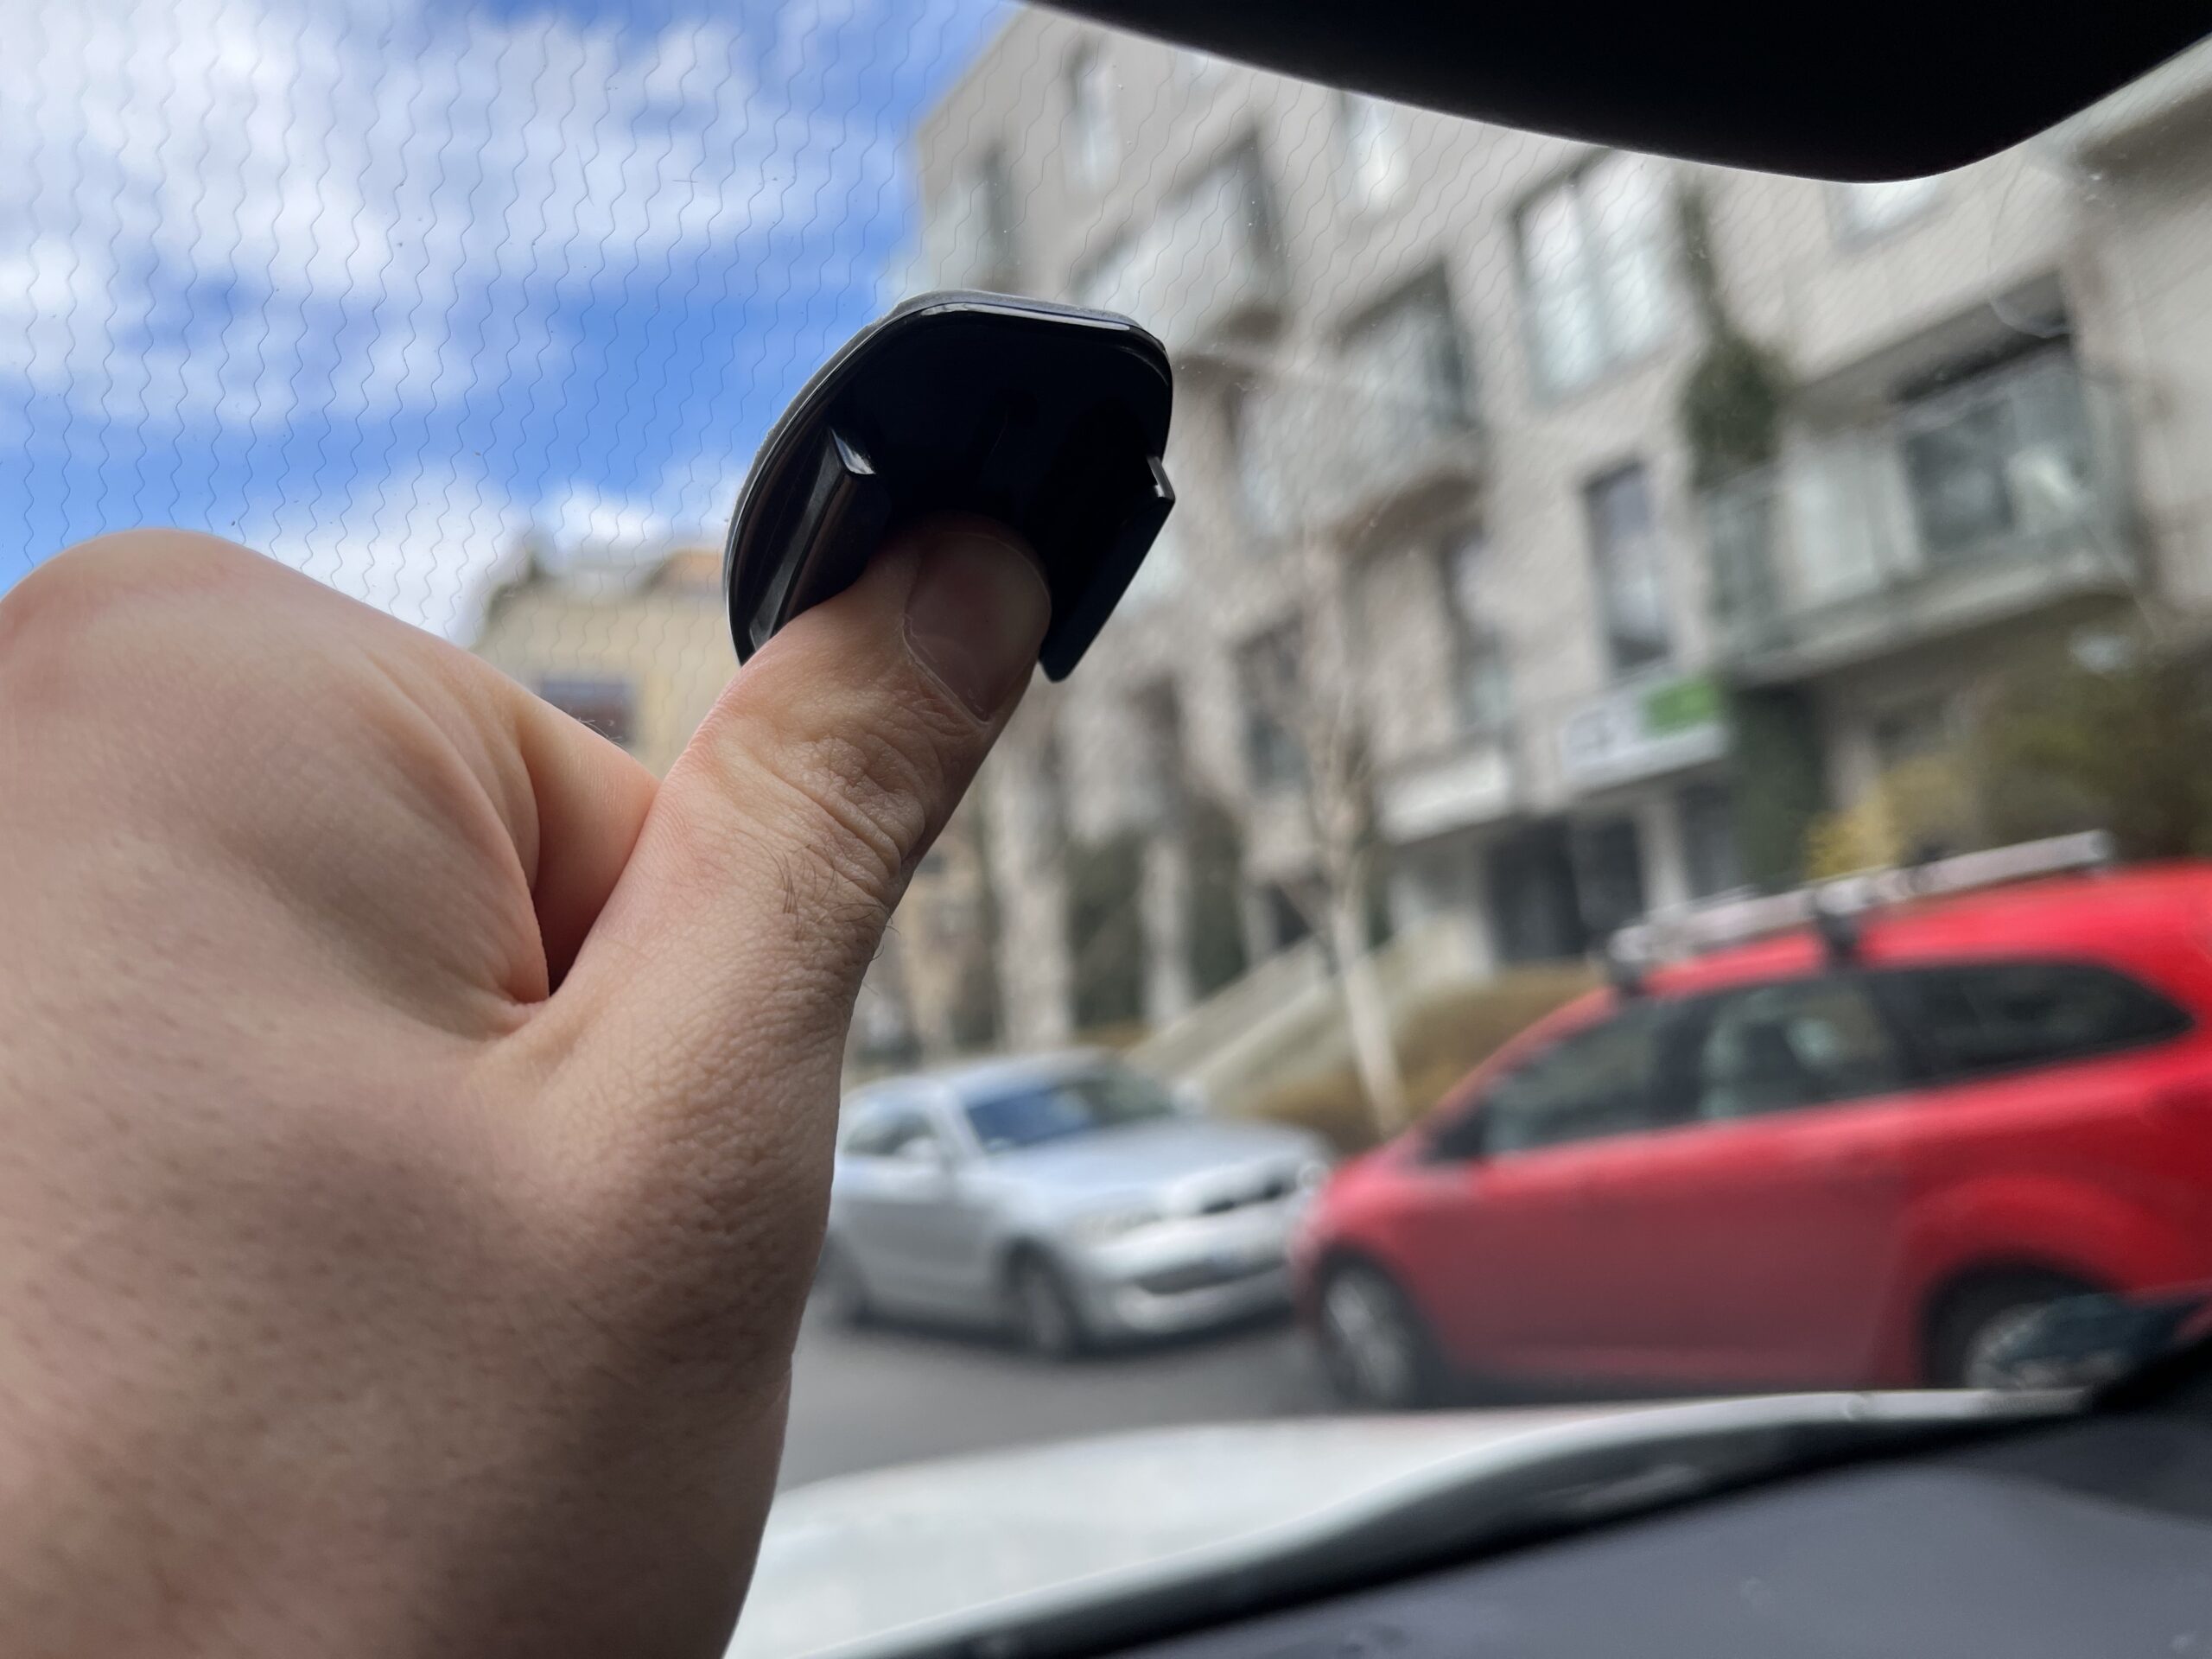
While ensuring that the car is off, disconnect the camera cable and plug the harness cable in between the camera plugs. Make sure you hear the click when plugging the camera cables!:
Step 6: first
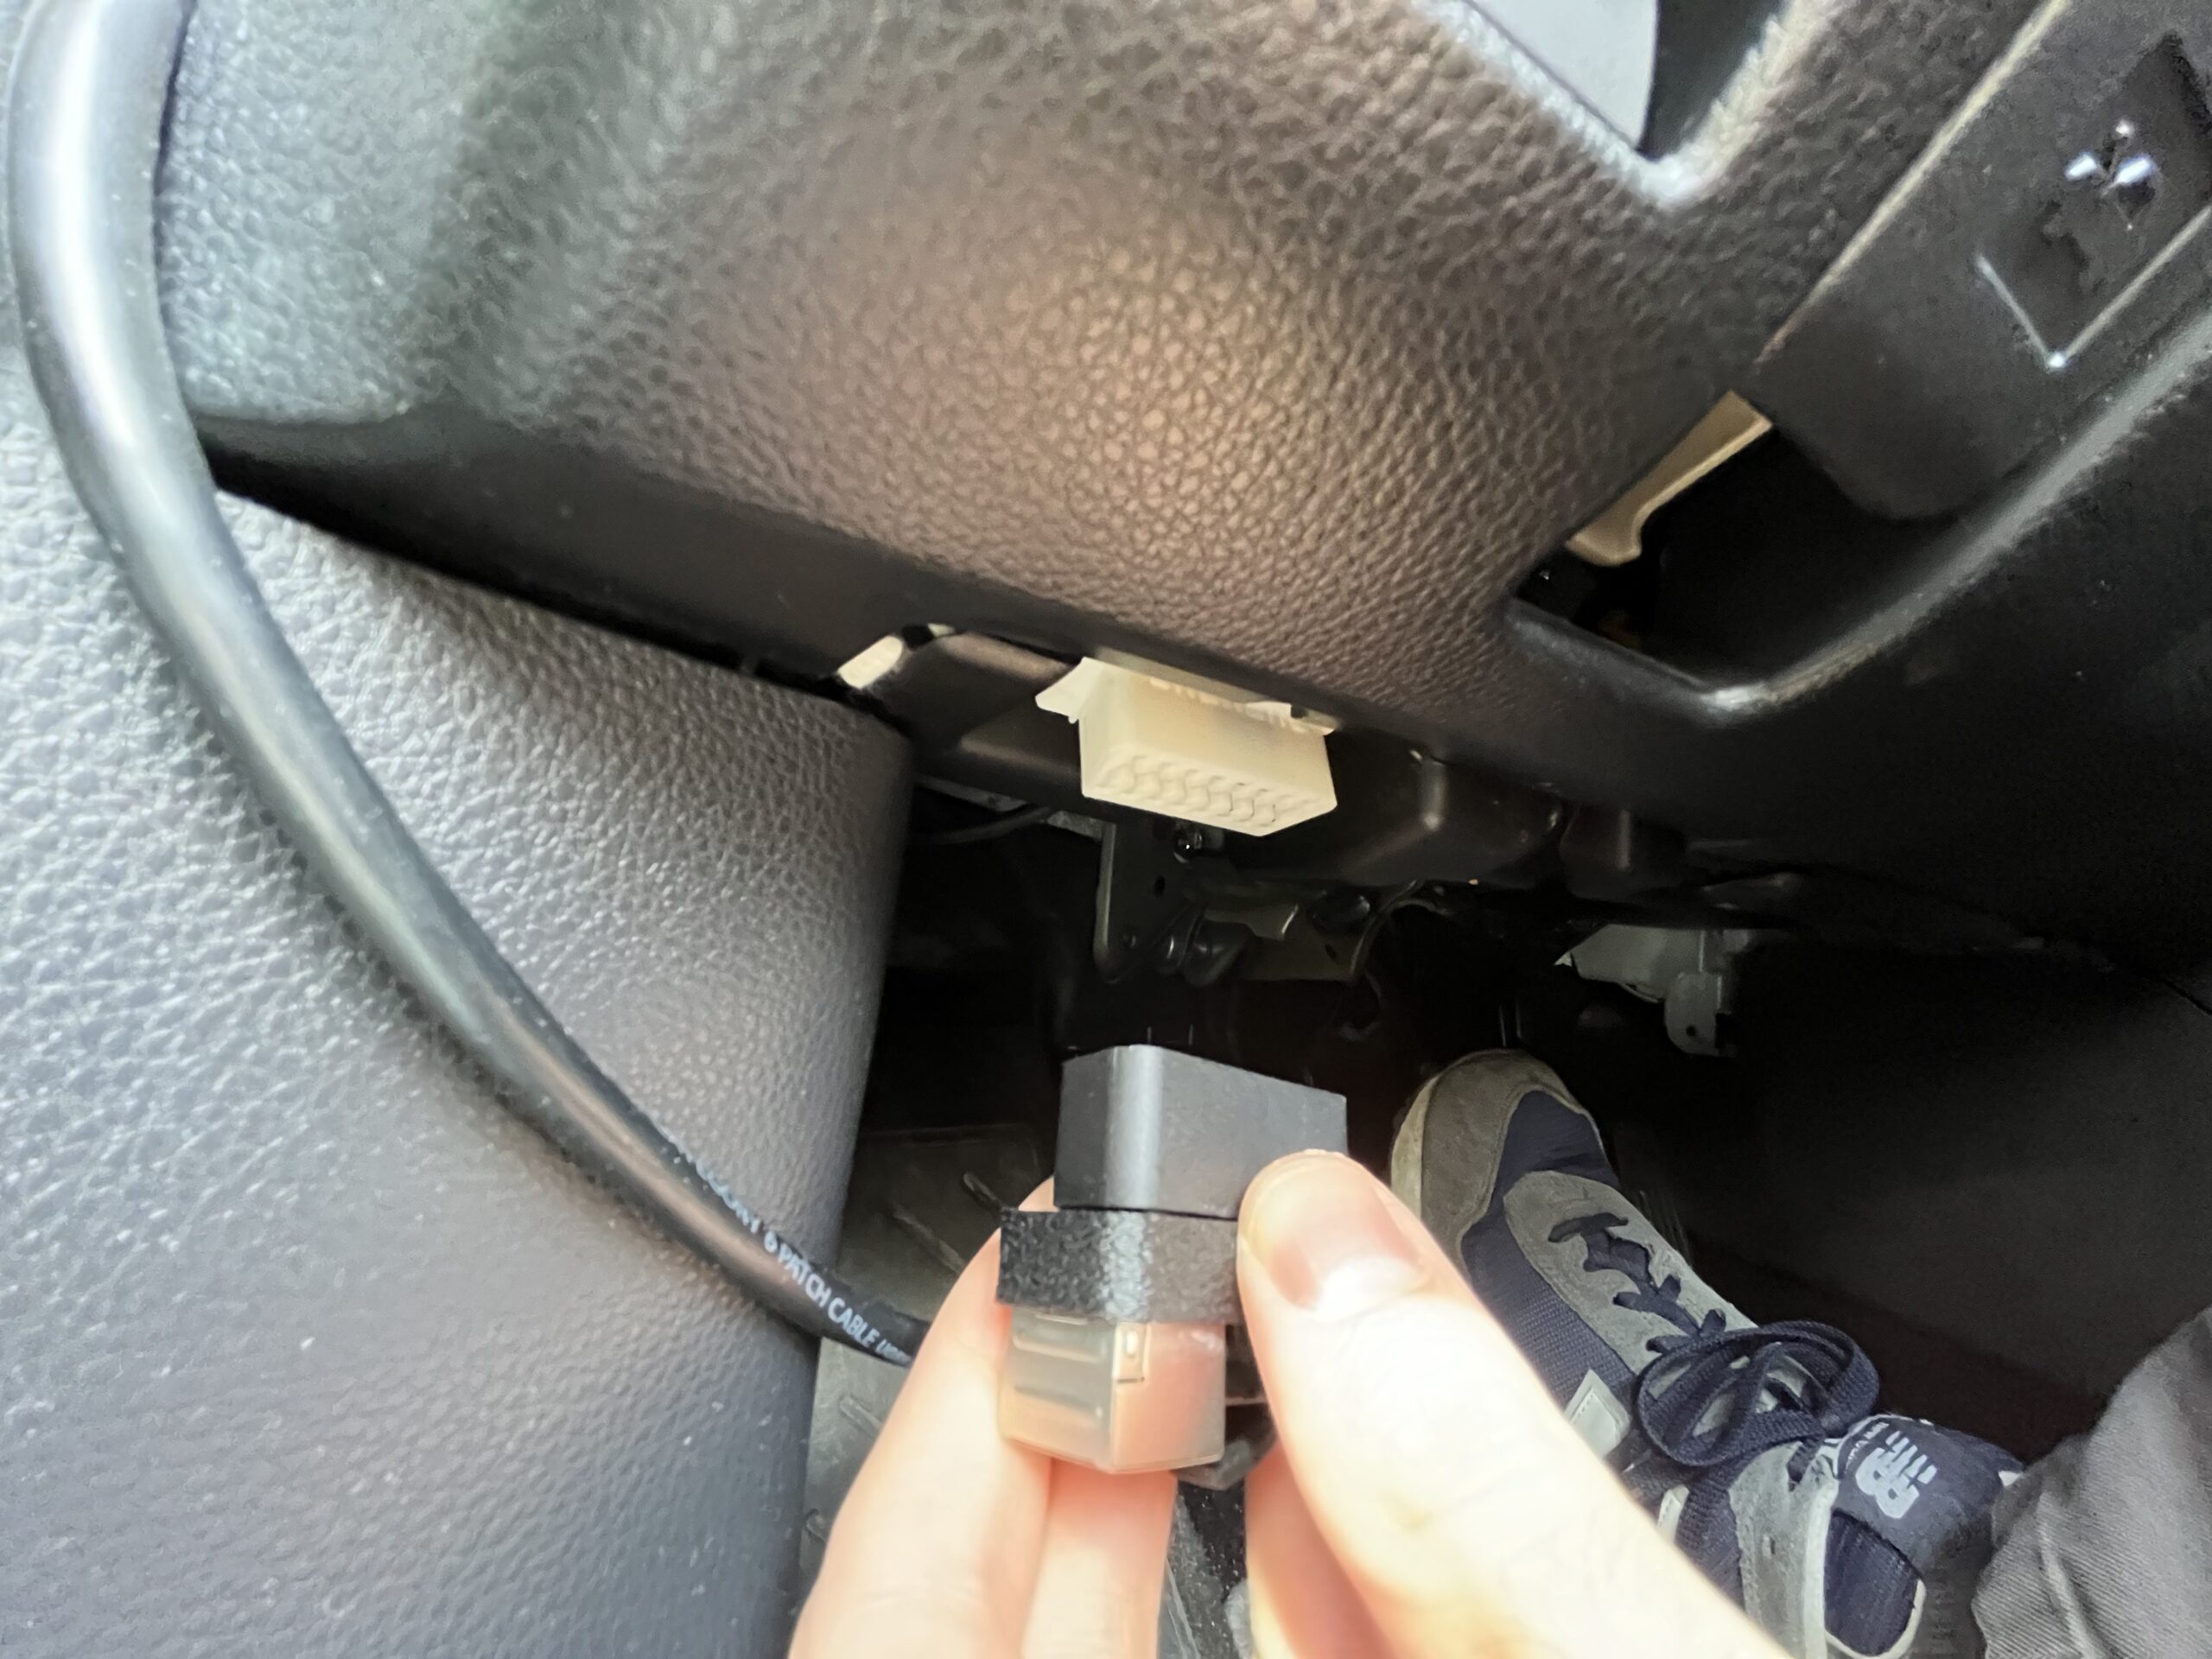
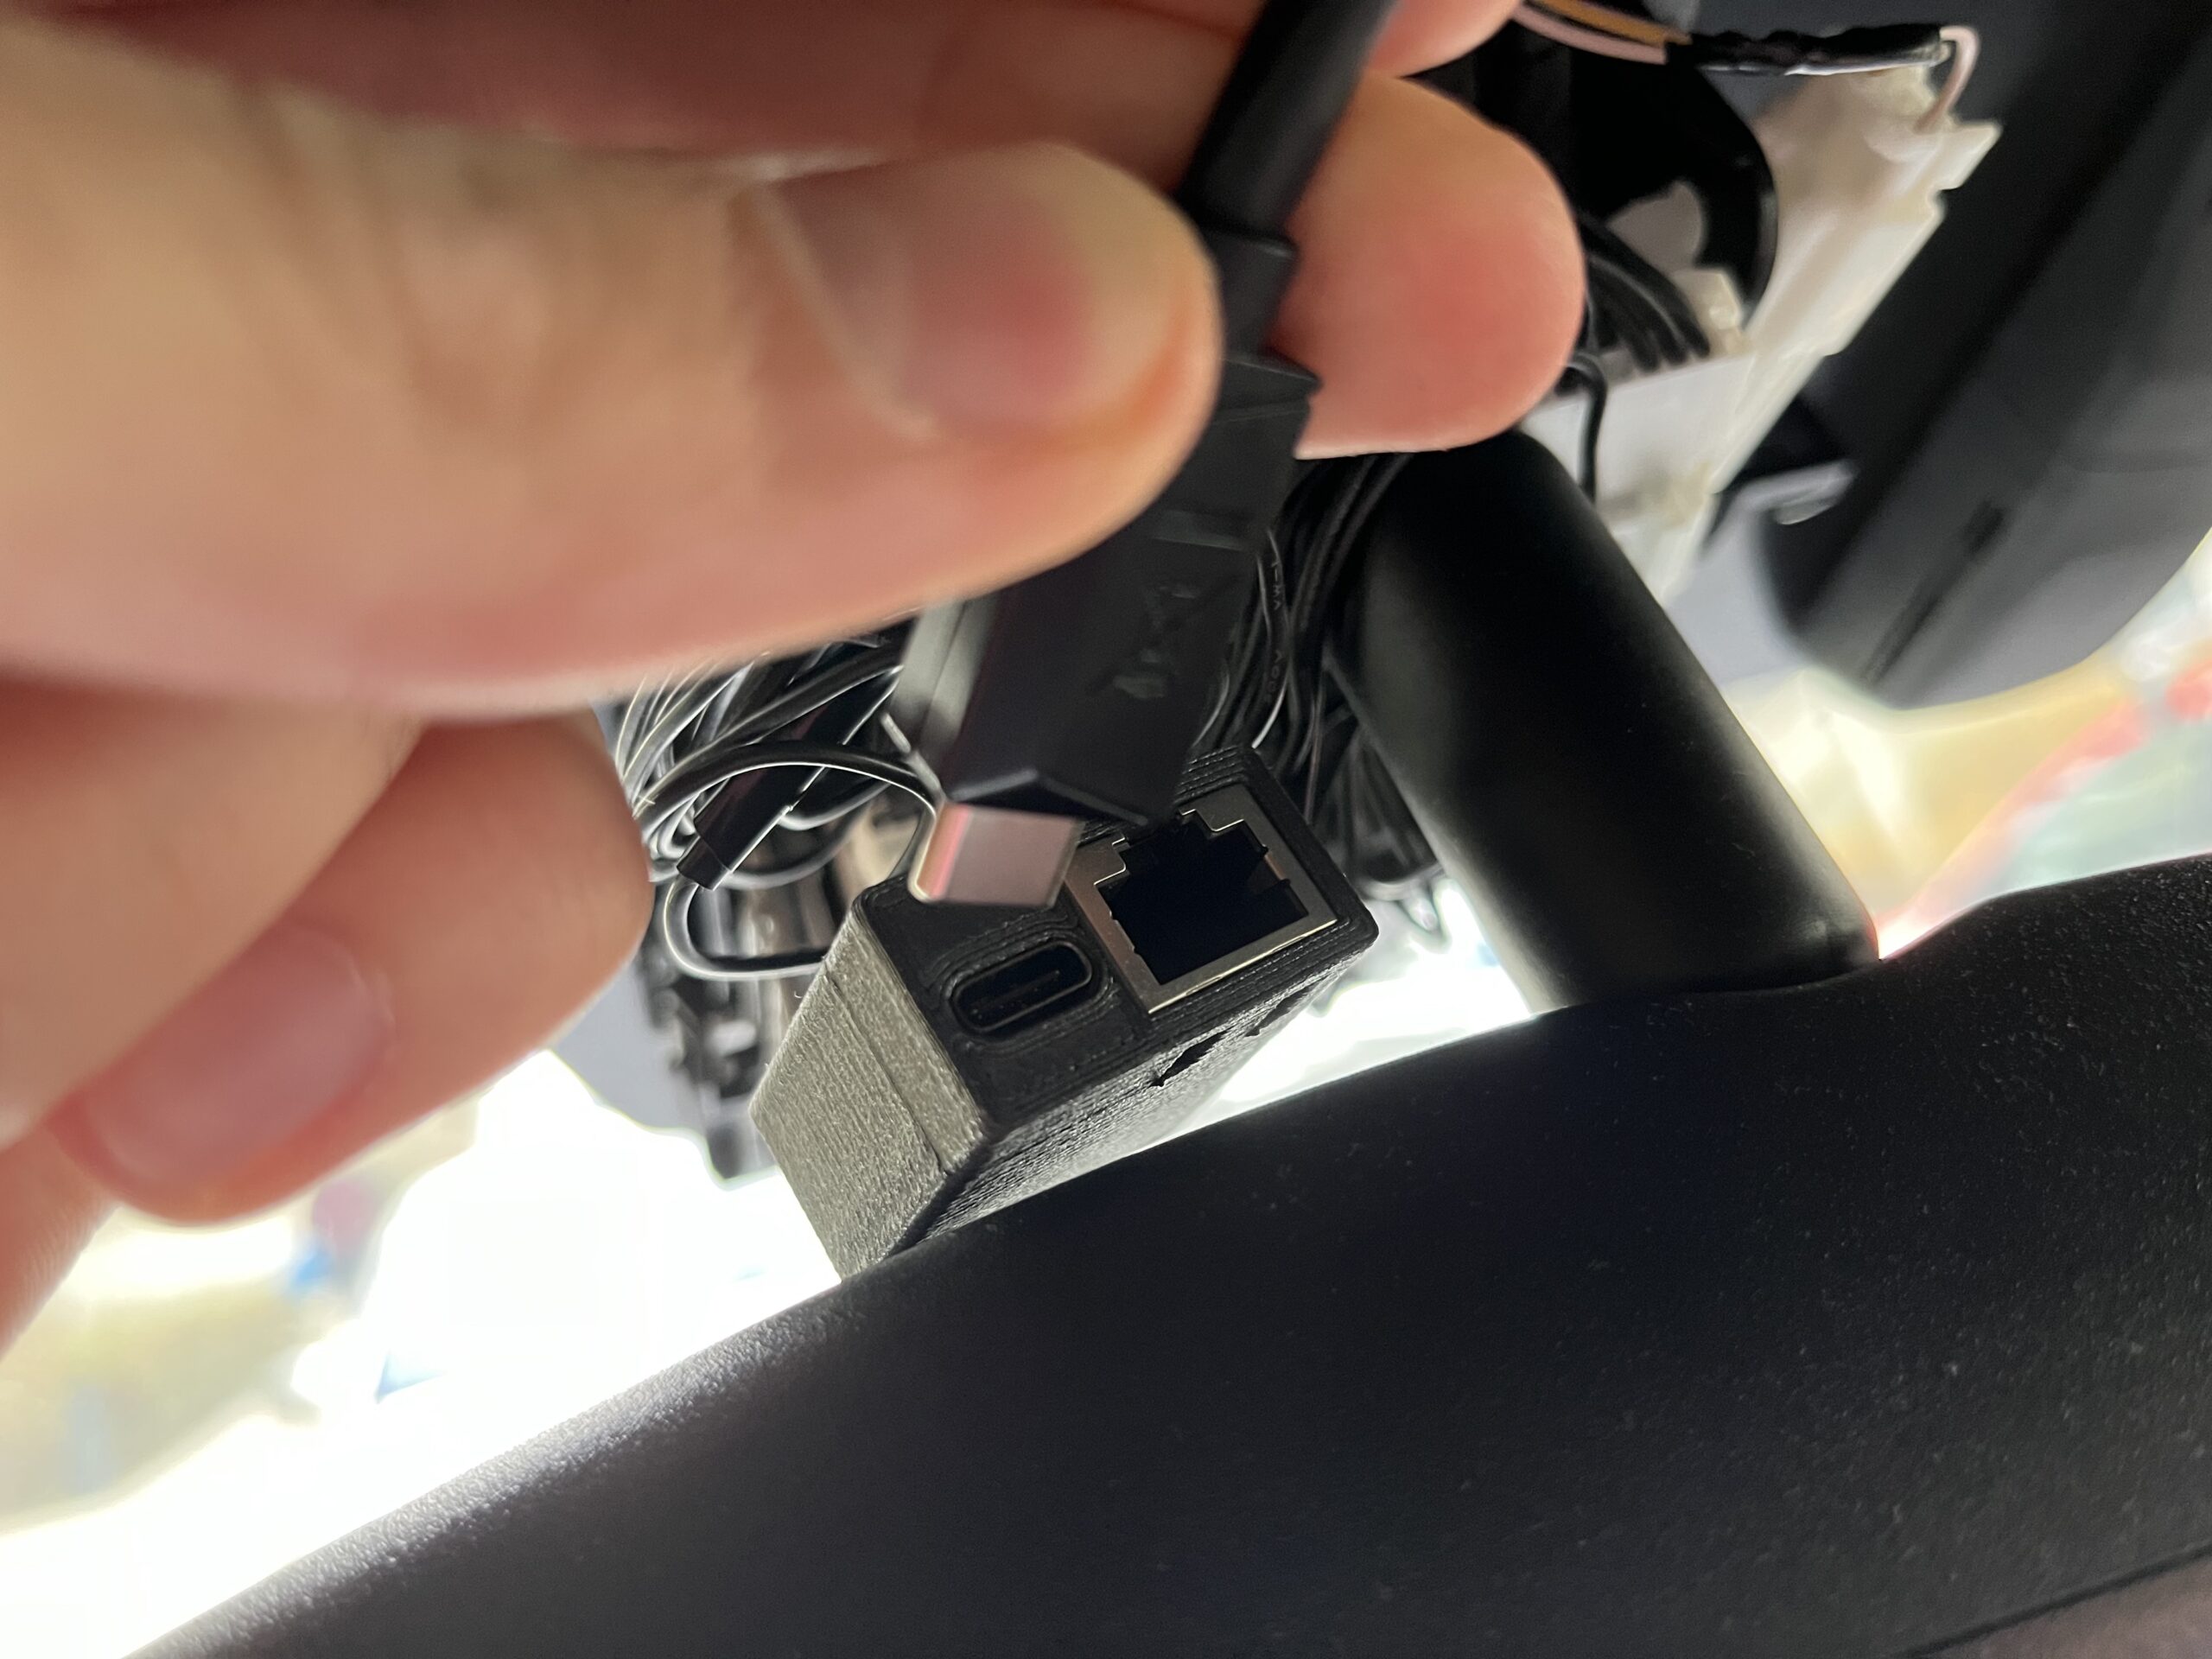
Connect the RJ45 cable between your OBD power and the harness box. Next plug the OBD power into your OBDII Port in your car. Then connect the USB-C to C 3.2 Gen2 cable between the Harness box and the Springer kit.
Step 7:
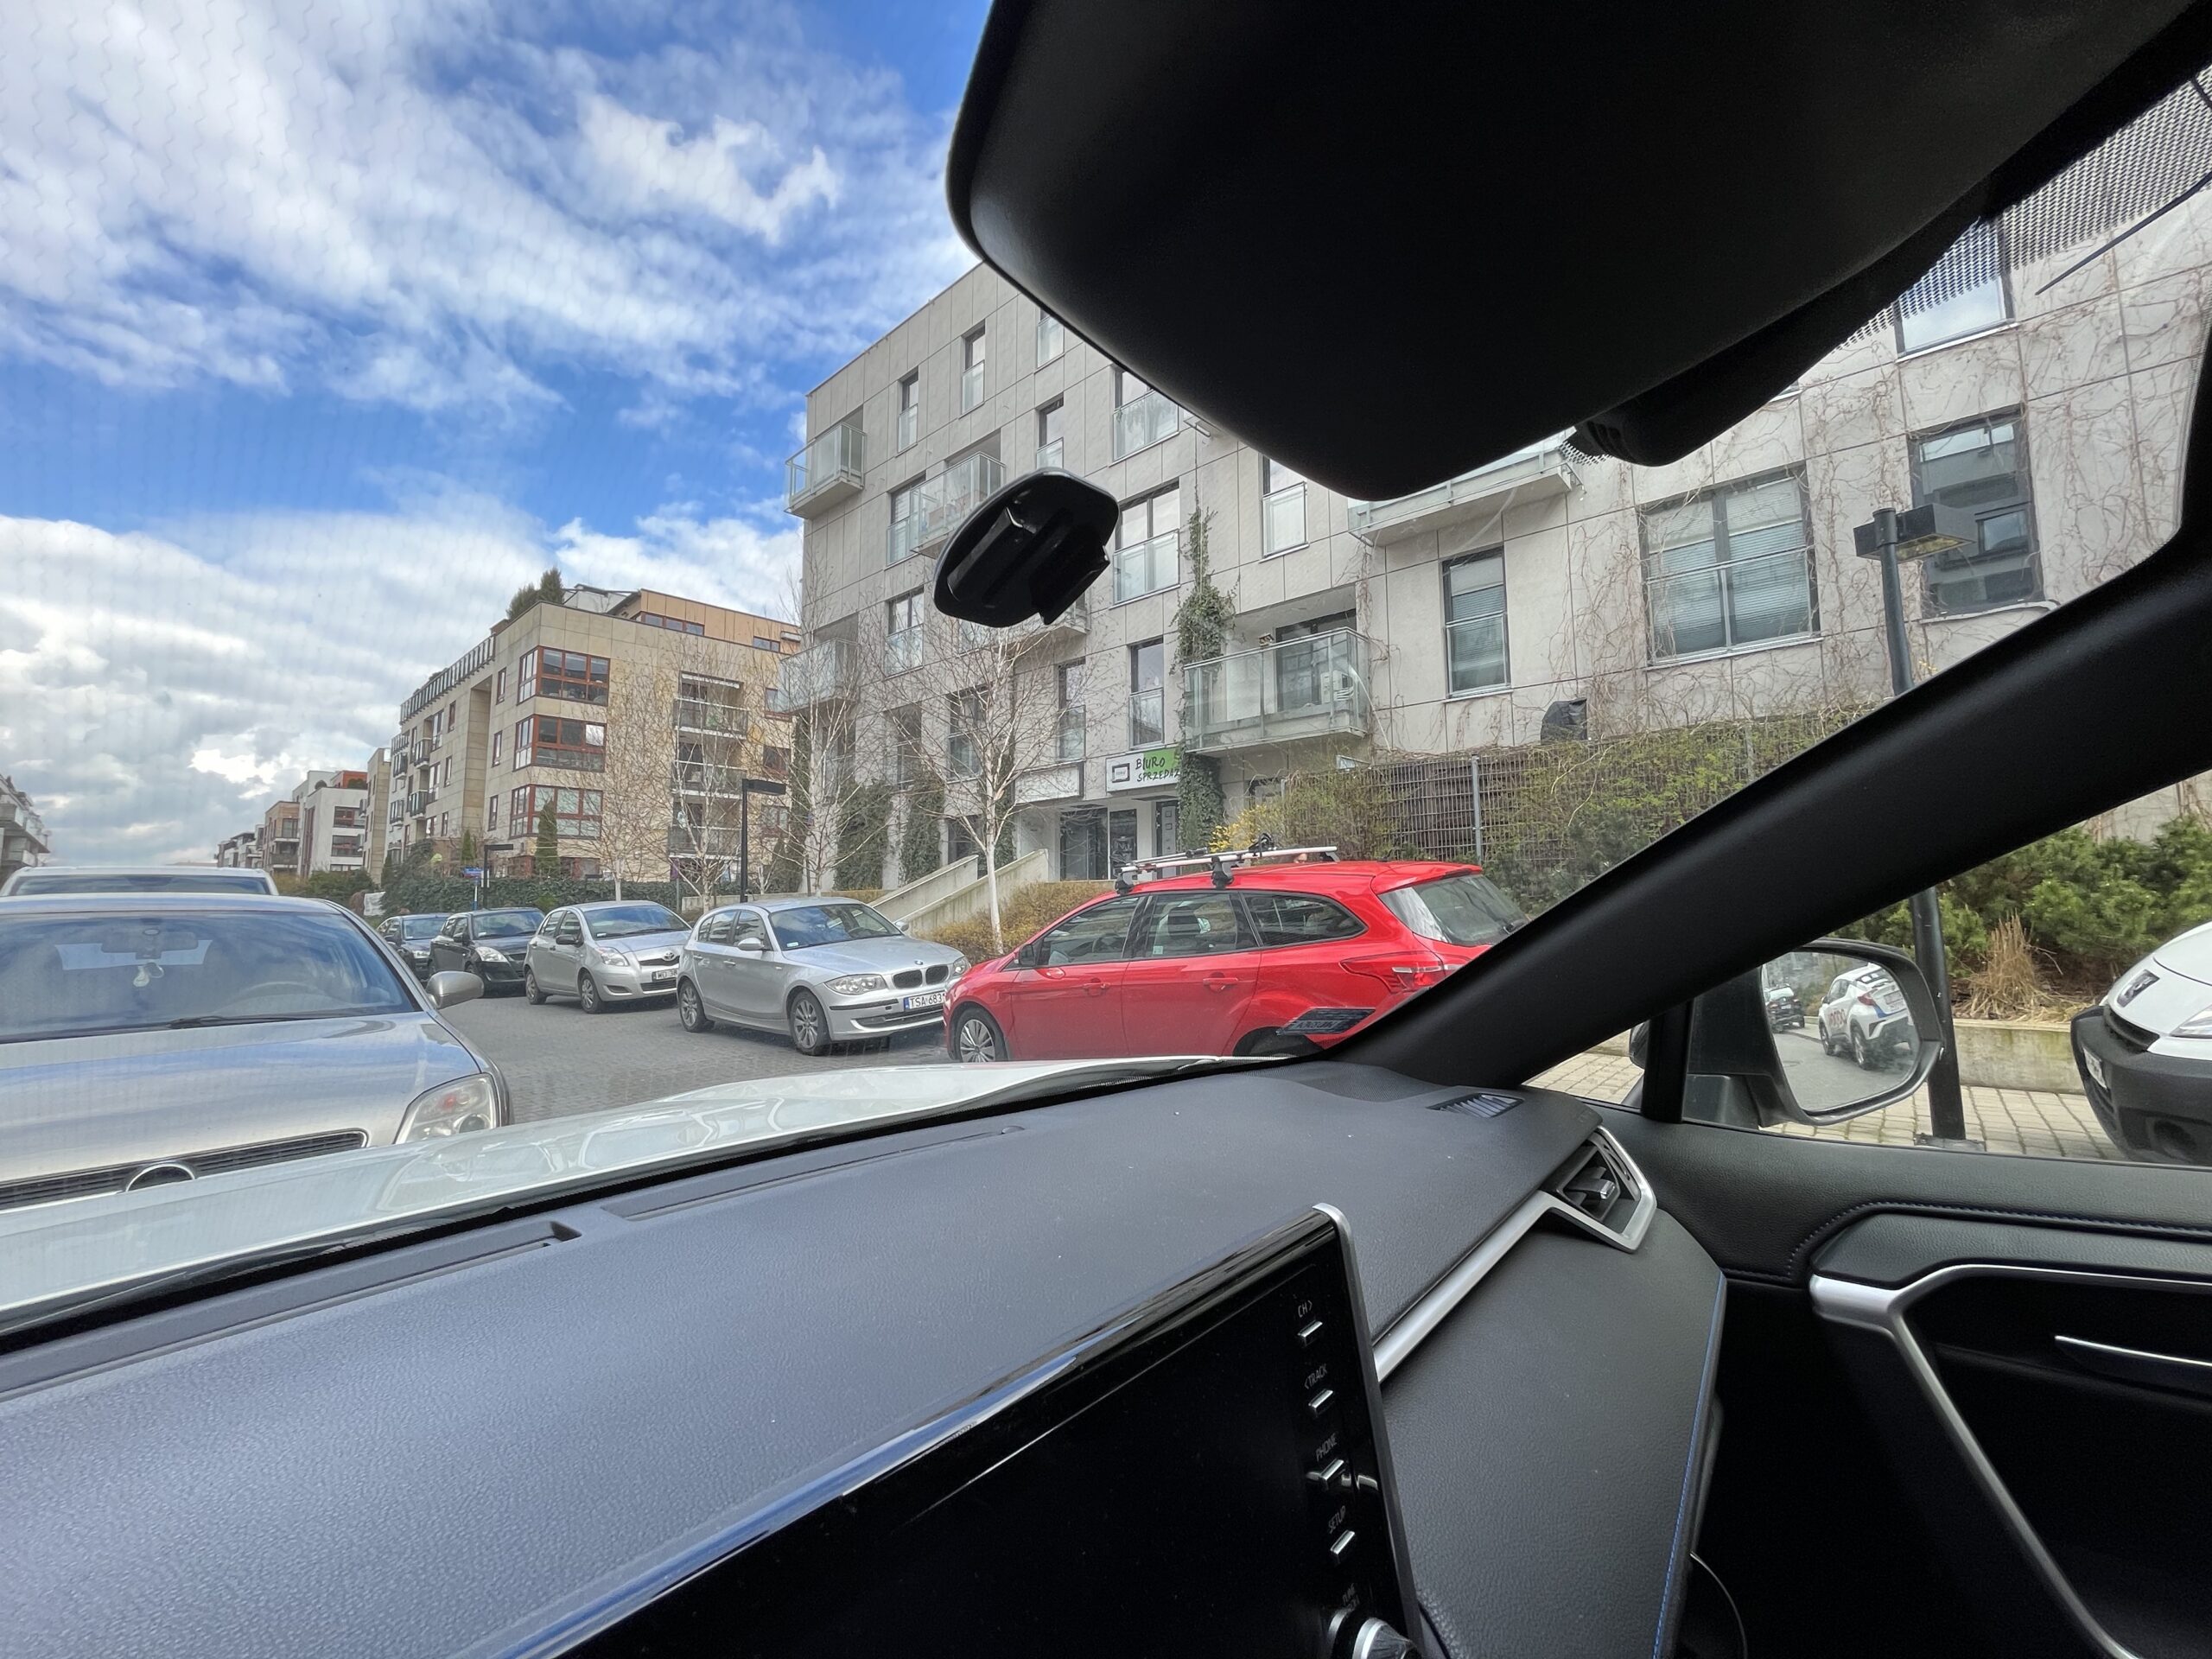
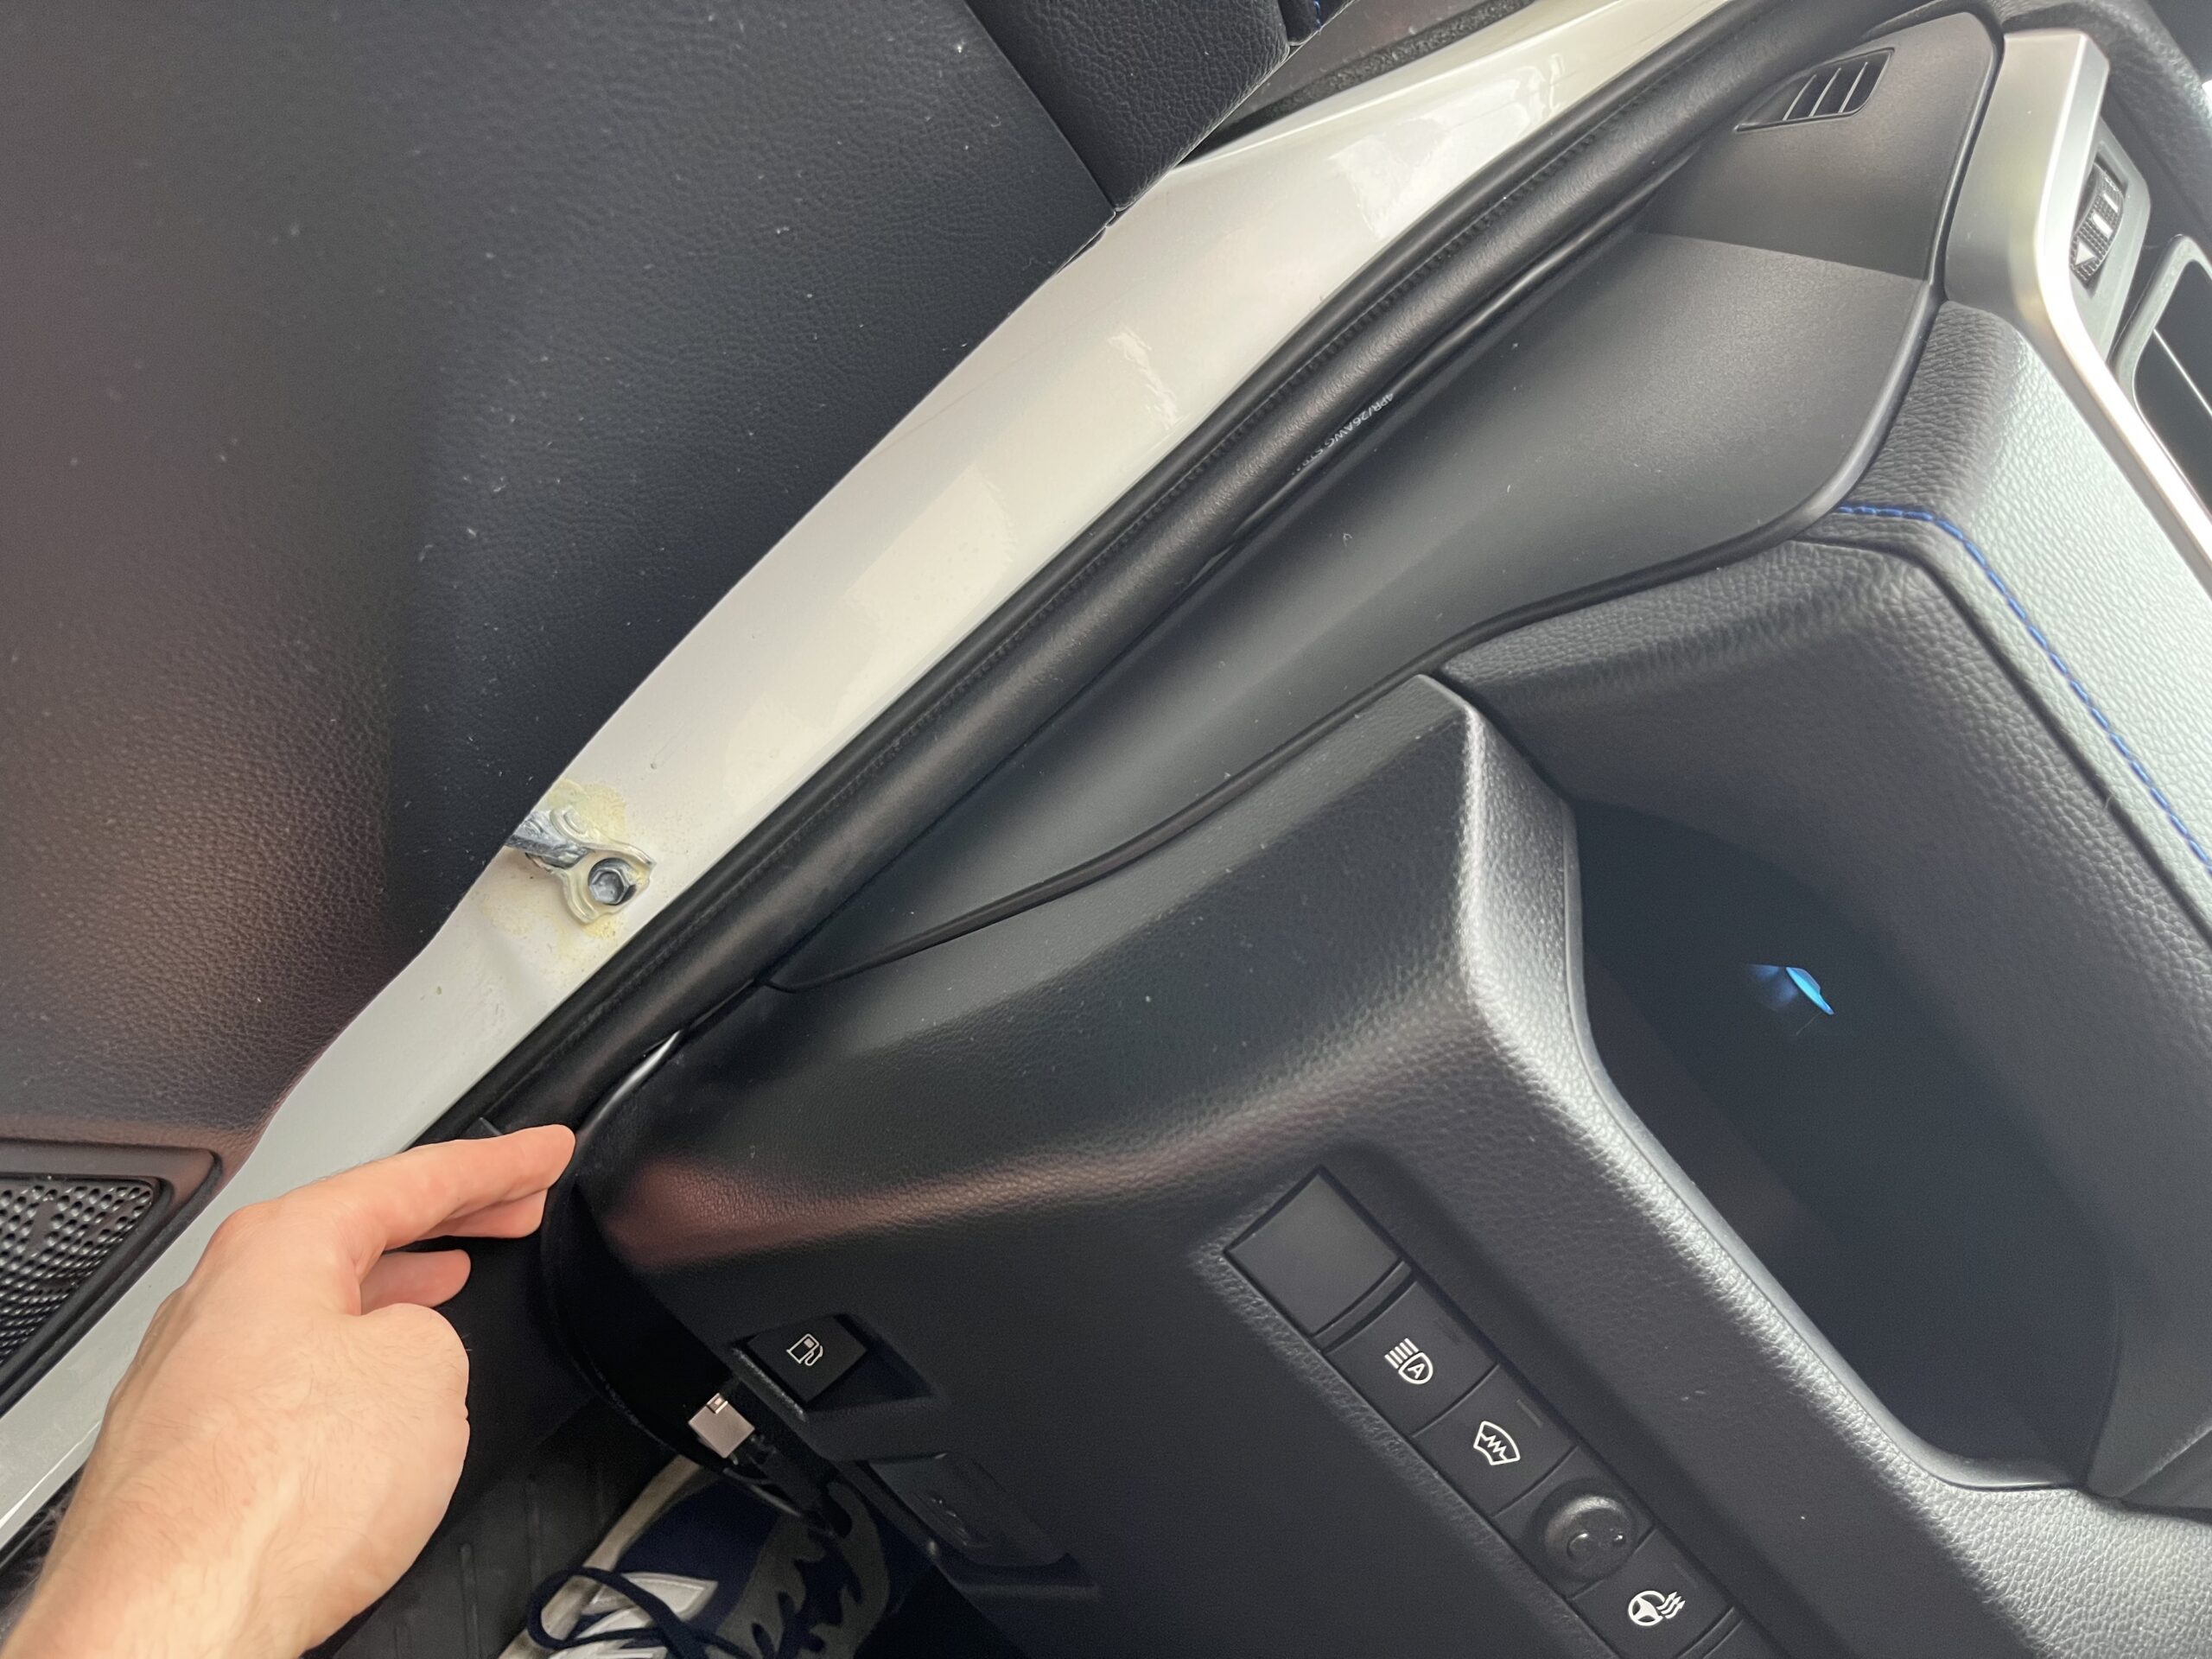
Carefully hide the cables behind the plastic cover.

Then, ensuring that all cables are safe, carefully put the windshield camera plastic cover on.
Step 8:
Stick the camera module in the top of the middle area of your windshield.
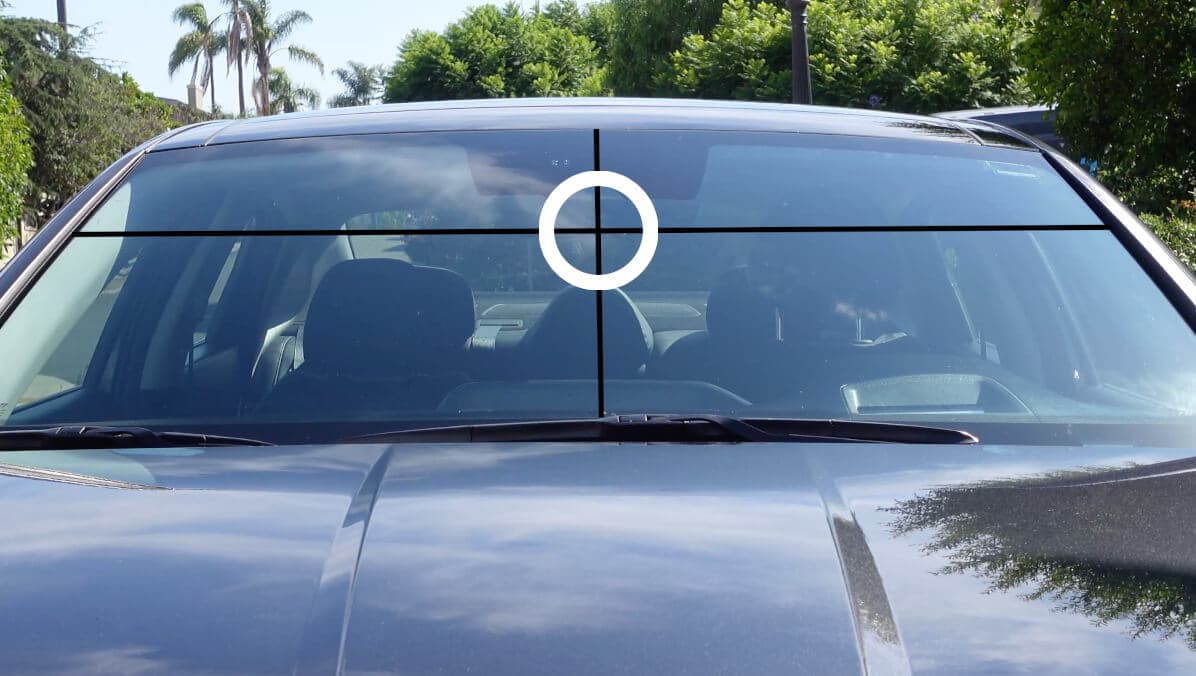
Use moderate force and press the go-pro mount onto the windshield.
Step 9:
Connect your OBD power to OBDII port, then hide the cables behind the vehicle trim along the windshield, doorframe, or dash
That’s it, you are ready to go 🙂